Alpine Stitch Stocking Ornament Free Crochet Pattern
Introduction
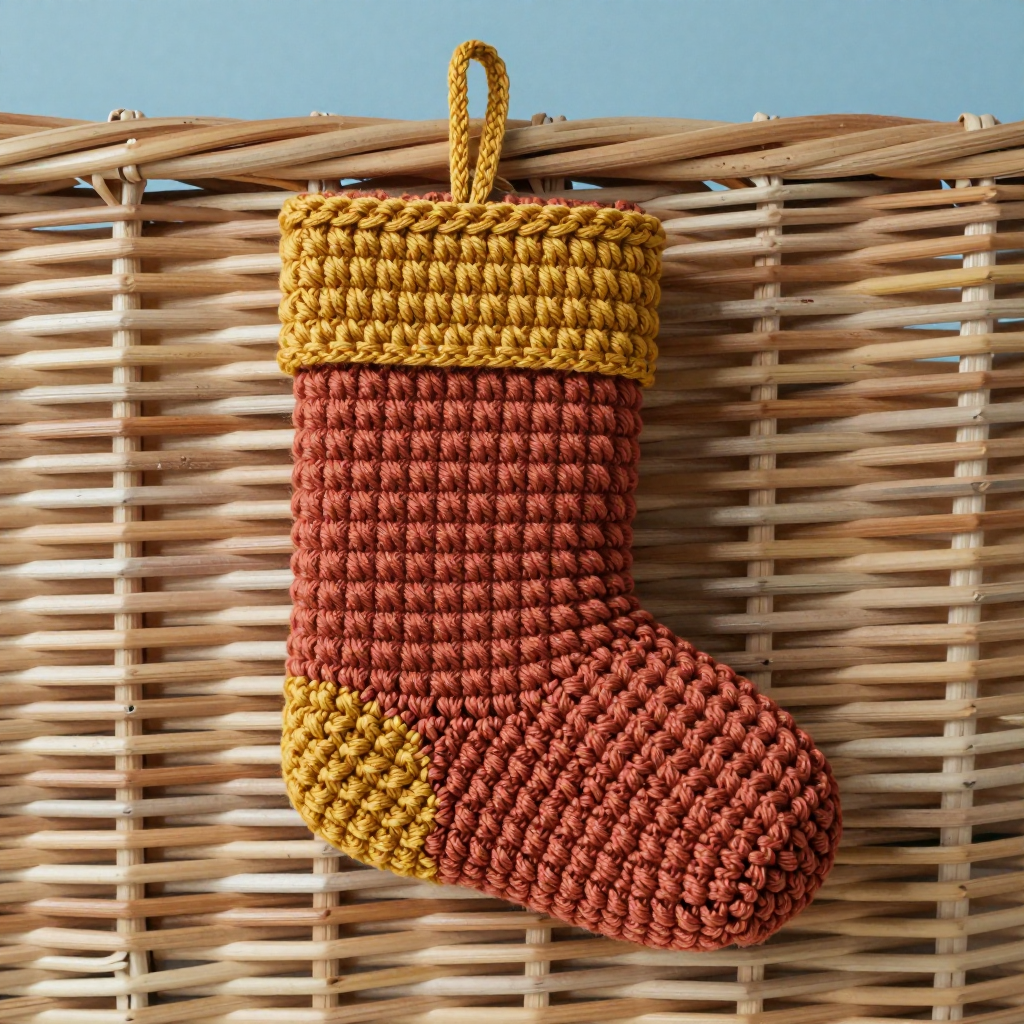
This little Alpine Stitch Stocking Ornament is a sweet, quick project for anyone who wants a handmade touch on the tree without committing to a full-size stocking. It is worked as a simple flat rectangle, folded and seamed into a pocket, so even a first-time crocheter can finish it in under an hour. The alpine stitch gives the terracotta body a lovely raised, woven texture, while the mustard cuff and loop add a warm, vintage contrast. At about 4 inches long and 2.5 inches wide, it feels soft and squishy in velvet yarn and is just the right size to hold a gift card or a small treat.
Materials Needed
- Yarn: Worsted weight velvet yarn (such as Bernat Velvet). Color A (terracotta): 30 yds. Color B (mustard): 10 yds.
- Hook: 5.0 mm (H-8) crochet hook.
- Notions: Tapestry needle for seaming and weaving in ends, scissors, and a stitch marker (optional).
- Finished size: Approximately 4 inches long x 2.5 inches wide.
Abbreviations
- ch — chain: make a loop of yarn and pull it through the loop on your hook.
- dc — double crochet: yarn over, insert hook in stitch, pull up a loop, yarn over and pull through two loops, yarn over and pull through the last two loops.
- Fpdc — front post double crochet: work a double crochet around the post (the vertical bar) of the stitch below, inserting the hook from front to back to front.
- sc — single crochet: insert hook in stitch, pull up a loop, yarn over and pull through both loops.
- sl st — slip stitch: insert hook in stitch, yarn over and pull through both the stitch and the loop on your hook.
- st(s) — stitch(es).
- turn — flip your work so you can work back across the row.
Gauge
14 stitches x 8 rows = 4 inches in alpine stitch. To check, crochet a small swatch in the pattern and measure a 4-inch section; adjust your hook size if your stitches are much larger or smaller than this.
Tips Before You Start
- Velvet yarn can shed and slip, so keep your tension relaxed and avoid frogging too often — the pile can crush if you rip back repeatedly.
- Count your stitches at the end of every row; the alpine stitch pattern depends on keeping a steady 19 stitches.
- When working Fpdc, insert the hook around the post of the stitch below, not into the top loops, to get the raised texture.
- Leave a long tail when you change to Color B so you have plenty of yarn for seaming later.
Step-by-Step Instructions
Stocking Body (Color A)
Row 1: Ch 21, dc in 3rd ch from hook, dc across (19 sts).
Row 2: Ch 2, turn, [Fpdc around next st, dc in next st] across, ending with dc (19 sts).
Row 3: Ch 2, turn, dc in each st across (19 sts).
Rows 4-9: Repeat Rows 2-3 three times (19 sts).
Cuff (Color B)
Change to Color B.
Row 10: Ch 1, turn, sc in each st across (19 sts).
Row 11: Ch 1, turn, sc in each st across (19 sts). Fasten off.
Hanging Loop (Color B)
Join Color B to the top right corner of the cuff, ch 10, sl st to the same corner. Fasten off.
Assembly and Finishing
Fold the stocking in half with right sides together, matching the side edges and the bottom edge. Using a tapestry needle and a length of Color A (or your long Color B tail if you prefer), whipstitch along the side and bottom edges to close the pouch. Turn the stocking right side out so the seams are hidden inside. Weave in all ends neatly on the inside. Gently block by misting lightly with water and shaping flat; do not press velvet with a hot iron, as it will crush the pile.
Pro Tips and Variations
- Swap the mustard cuff for cream or deep green for a different holiday palette.
- Add a tiny jingle bell or a small button to the cuff for extra charm.
- Make a set in several colors and string them along a garland for a coordinated tree display.


