Button-Spot Ladybug Doll Crochet Free Pattern
Introduction
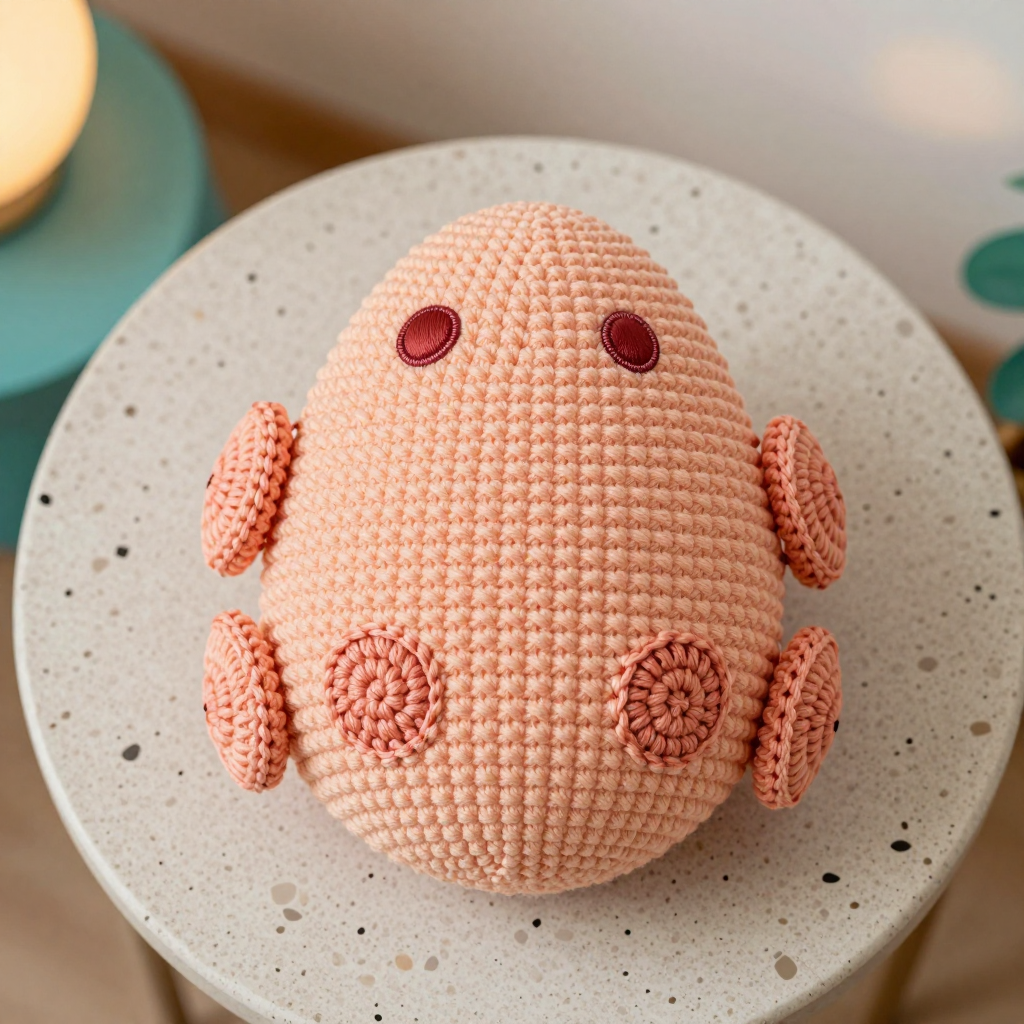
This little Button-Spot Ladybug is the perfect first amigurumi project: a single egg-shaped doll worked in smooth single crochet, with six flat apricot circles sewn on as spots. At about 4.5 inches (11.5 cm) tall, it fits in the palm of your hand and feels soft and squishy, thanks to worsted-weight acrylic and a tight, even stitch. The peach body tapers to a rounded top and a closed bottom, while the apricot spots and tiny satin-stitch eyes give it a sweet, button-like look. If you can make a magic ring and single crochet, you can make this ladybug.
Materials Needed
- Yarn: Worsted weight acrylic — peach (A) 50 yd (46 m); apricot (B) 20 yd (18 m)
- Hook: 3.5 mm (E/4)
- Notions: Stitch marker, tapestry needle, scissors, small amount of polyester fiberfill
- Finished size: Approx. 4.5 inches (11.5 cm) tall
Abbreviations
- ch — chain
- sc — single crochet
- inc — increase: work 2 sc into the same stitch
- dec — decrease: work 2 stitches together into 1 sc
- MR — magic ring (adjustable loop)
- st(s) — stitch(es)
- rnd — round
- [ ] x6 — repeat the instructions in brackets 6 times
Gauge
20 sc x 22 rnds = 4 inches (10 cm) in single crochet. To check, crochet a small flat swatch in sc and measure a 4-inch section; if you have more stitches than 20, go up a hook size, and if fewer, go down.
Tips Before You Start
- Work tightly and evenly so the stuffing doesn't show through; a slightly smaller hook than you'd use for garments helps.
- Use a stitch marker in the first stitch of each round — amigurumi is worked in a continuous spiral, so rounds aren't joined.
- Stuff the body firmly but gradually, starting around Rnd 10, so the egg shape stays smooth.
- Make all six spots first and lay them out on the finished body before sewing, so the spacing is even.
Step-by-Step Instructions
Spots (Color B) — make 6
Rnd 1: Ch 2, 6 sc in 2nd ch from hook (6 sts).
Rnd 2: Inc in each st around (12 sts).
Fasten off, leaving a 6-inch tail for sewing. Set spots aside.
Body (Color A)
Rnd 1: MR, 6 sc into the ring (6 sts).
Rnd 2: Inc in each st around (12 sts).
Rnd 3: [sc, inc] x6 (18 sts).
Rnd 4: [2 sc, inc] x6 (24 sts).
Rnd 5: [3 sc, inc] x6 (30 sts).
Rnd 6: [4 sc, inc] x6 (36 sts).
Rnds 7–12: Sc in each st around (36 sts).
Rnd 13: [4 sc, dec] x6 (30 sts).
Rnd 14: [3 sc, dec] x6 (24 sts).
Rnd 15: [2 sc, dec] x6 (18 sts).
Rnd 16: [sc, dec] x6 (12 sts).
Stuff the body firmly before the opening gets too small.
Rnd 17: Dec x6 (6 sts).
Fasten off, leaving a long tail. Thread the tail through the front loops of the last 6 sts and pull to close.
Eyes (Color B)
With apricot yarn and a tapestry needle, embroider two small eyes with satin stitch on the front of the body, about 1 inch (2.5 cm) apart and slightly above the center.
Assembly and Finishing
Arrange the six spots evenly around the body, three on each side, with the eyes marking the front. Pin or hold each spot in place and sew it down with its tail, catching only the surface of the body so the stitches don't show inside. Weave in all ends. Gently shape the ladybug with your hands and lightly steam or mist and air-dry to smooth the surface — do not machine wash or tumble dry.
Pro Tips and Variations
- Swap apricot for mustard or soft pink for a different colorway, or make the body in two shades for a two-tone bug.
- Use safety eyes instead of embroidery for a more toy-like look (recommended for ages 3+ only).
- Add a small crocheted chain loop at the top to turn it into a bag charm or hanging ornament.