Candy Ribbed Bandeau with Flower Trim - Free Crochet Pattern
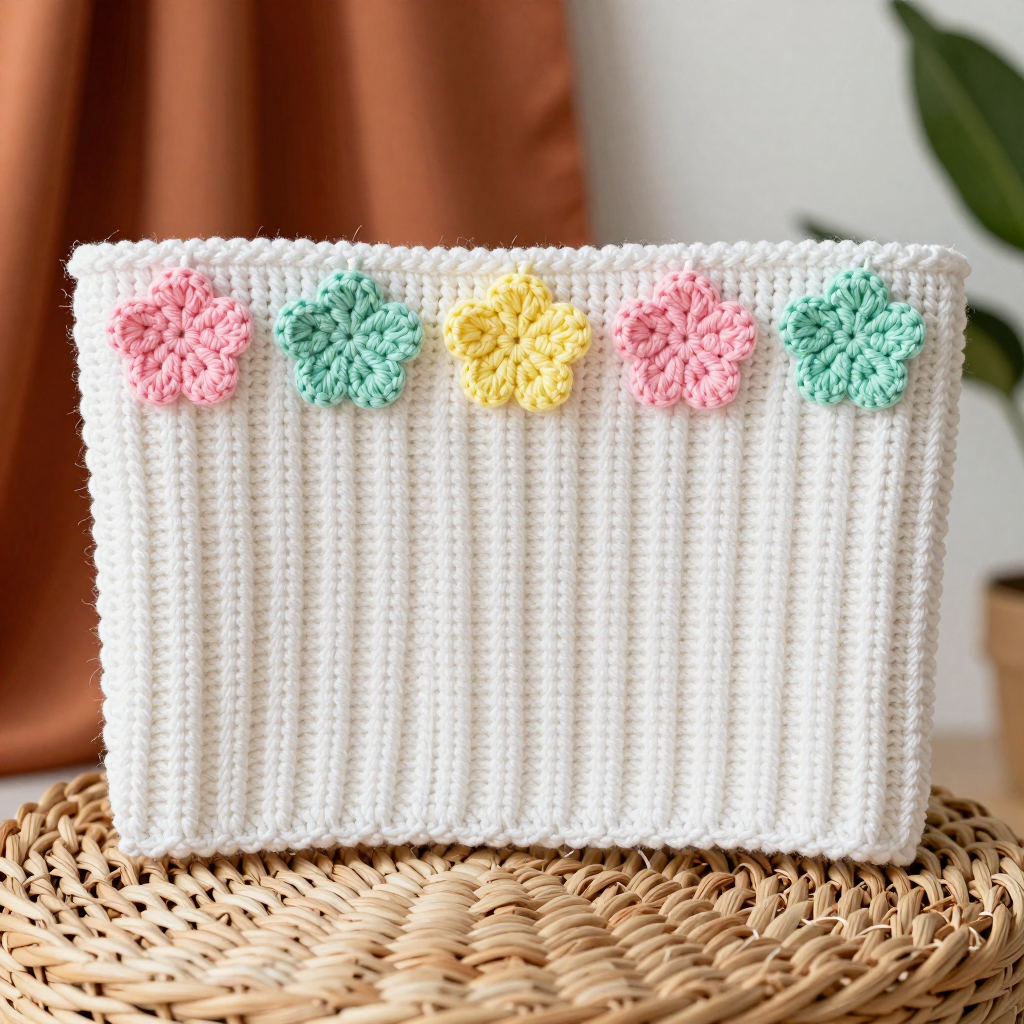
Candy Ribbed Bandeau with Flower Trim - Free Crochet Pattern
Introduction
This sweet little bandeau is the perfect project for anyone who has mastered the basic stitches and wants to try something with a little more texture. Worked flat in front and back post double crochet ribbing, it builds up quickly into a stretchy, vertical-ridged tube that hugs gently without any shaping or darts. The pastel flower trim along the top edge gives it a cottagecore charm that looks lovely with summer dresses or layered under a cardigan. Whether you are making an early Christmas gift or a treat for yourself, this top is soft, simple, and surprisingly quick to finish.
Materials Needed
- Yarn: Worsted weight acrylic (such as Red Heart Super Saver). Color A (White): 150 yd; Color B (Pastel Pink): 50 yd; Color C (Pastel Mint): 50 yd; Color D (Pastel Yellow): 30 yd.
- Hook: 5.0 mm (H-8) crochet hook.
- Notions: Tapestry needle, scissors, stitch markers, measuring tape.
- Finished size: To fit bust 32–34 inches. Flat, unstretched width 14 inches, height 6 inches; stretches to fit up to 36 inches bust.
Abbreviations
- ch – chain
- dc – double crochet
- fpdc – front post double crochet (work the dc around the post of the stitch in front, from front to back)
- bpdc – back post double crochet (work the dc around the post of the stitch behind, from back to front)
- sc – single crochet
- sl st – slip stitch
- MR – magic ring
- rep – repeat
- st(s) – stitch(es)
Gauge
14 stitches x 12 rows = 4 inches in front/back post ribbing pattern. To check your gauge, work a small swatch in the ribbing pattern and measure a 4-inch section; adjust your hook size if needed to match.
Tips Before You Start
- Keep your front and back post stitches consistent—the ribbing relies on alternating fpdc and bpdc in the same order each row to create the vertical ridges.
- Because the band is worked flat and then seamed, try it on before seaming to check the stretch and fit around your bust.
- Use a stitch marker to mark the first stitch of each row so you do not lose your place in the ribbing.
- When making the flowers, leave a 6-inch tail on each so you have plenty of yarn to sew them securely to the top edge.
Step-by-Step Instructions
Band (Color A)
Row 1: Ch 22, dc in 4th ch from hook and in each ch across (20 dc).
Row 2: Ch 2, turn, [fpdc, bpdc] across, ending with fpdc (20 sts).
Rows 3–42: Rep Row 2 (20 sts).
Fasten off, leaving a long tail for seaming.
Seaming the Band
Fold the band in half with right sides together and seam the short ends together using your yarn tail and tapestry needle to form a tube. Turn right side out.
Edging (Color A)
Top edge: With Color A, join yarn at the seam, ch 1, sc evenly around the top edge (approx 60 sc). Join with sl st to first sc. Fasten off.
Bottom edge: With Color A, join yarn at the seam, ch 1, sc evenly around the bottom edge (approx 60 sc). Join with sl st to first sc. Fasten off.
Flowers (Make 5: one each in B, C, D, B, C)
Rnd 1: MR, 6 sc into ring, pull ring closed (6 sc).
Rnd 2: [Ch 2, 2 dc, ch 2, sl st] in same st, rep in each st around (5 petals).
Fasten off, leaving a 6-inch tail for sewing.
Assembly and Finishing
Arrange the five flowers evenly along the top edge of the band, alternating colors in this order: pastel pink (B), pastel mint (C), pastel yellow (D), pastel pink (B), pastel mint (C). Pin each flower in place, then sew them securely to the top edge using the yarn tails and a tapestry needle. Weave in all remaining ends neatly on the inside of the band. Block lightly by misting with water and shaping flat to dry—do not stretch the ribbing while blocking.
Pro Tips and Variations
- For a longer bandeau, add extra rows in multiples of 2 before seaming; just remember to adjust the edging stitch count accordingly.
- Try a cotton or cotton-blend yarn for a cooler, more breathable summer top.
- Swap the flower colors for a monochrome look, or add a small pearl bead to each flower center for extra charm.


