Crochet Airy Textured Mesh Sweater Free Pattern
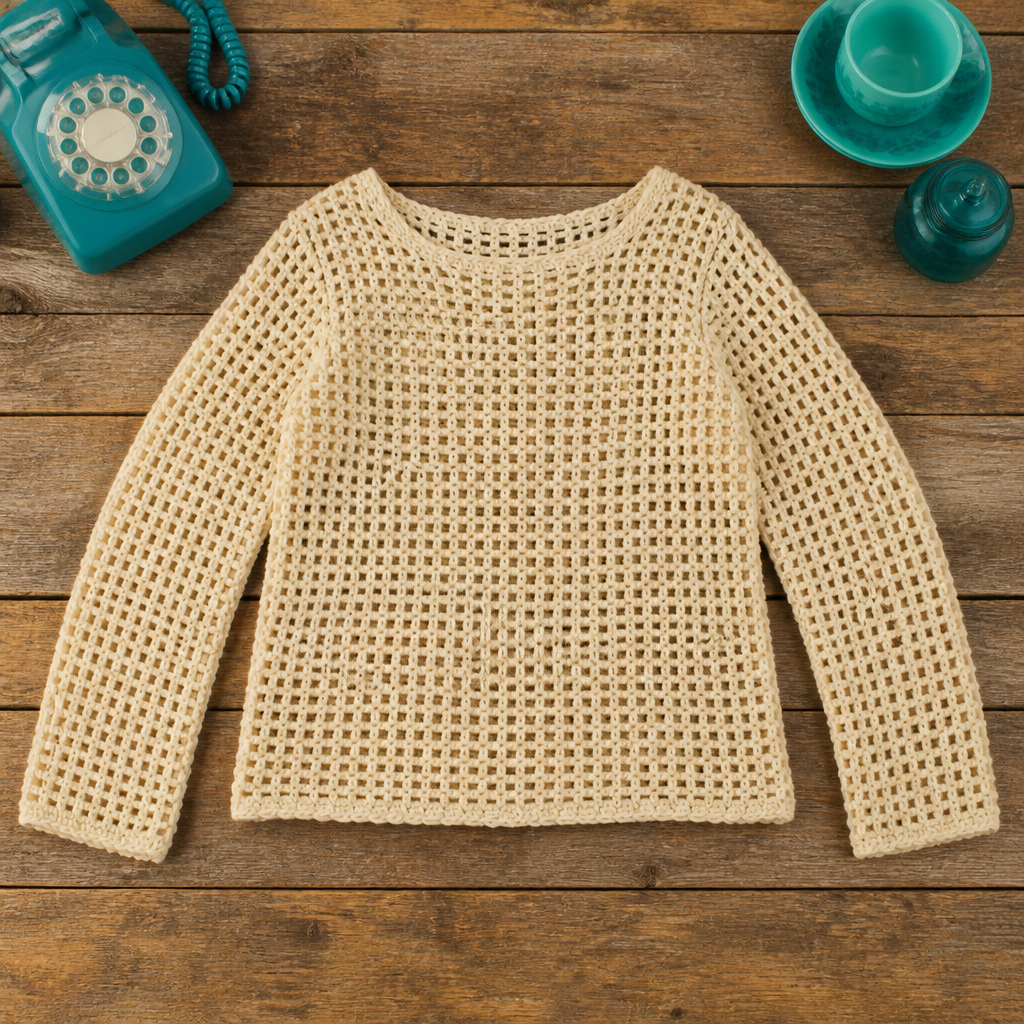
Crochet Airy Textured Mesh Sweater Free Pattern
Introduction
This airy textured mesh sweater is the perfect lightweight layer for transitional weather, designed for beginners who want a stylish, openwork garment without complicated shaping. The simple two-panel construction and repetitive mesh stitch make it a relaxing project that grows quickly, while the cream cotton yarn gives it a soft, breathable feel. The open mesh fabric drapes beautifully and stretches gently, creating a relaxed, comfortable fit that looks effortlessly elegant over a tank or dress. Whether you are new to crochet garments or looking for a quick summer project, this sweater is a wonderful choice.
Materials Needed
- Yarn: Light worsted weight yarn (100% cotton recommended), approximately 800–1000 yards in cream
- Crochet hook: Size H/8 (5.0 mm)
- Tapestry needle for weaving in ends
- Scissors
- Stitch markers
- Finished size: Body circumference approx. 58 inches (relaxed, open mesh); length approx. 20 inches from shoulder to hem; sleeve length approx. 18 inches from armhole to cuff; sleeve circumference approx. 14 inches. Measurements are taken flat and unstretched.
Abbreviations
- ch – chain: make a loop of yarn and pull it through the loop on your hook.
- sc – single crochet: insert hook into stitch, yarn over, pull up a loop, yarn over, pull through both loops.
- dc – double crochet: yarn over, insert hook into stitch, yarn over, pull up a loop, yarn over, pull through two loops, yarn over, pull through remaining two loops.
- sts – stitches
- rnd – round
Gauge
10 stitches and 10 rows = 4 inches in mesh pattern. To check gauge, crochet a small swatch in the mesh pattern and measure a 4-inch section; adjust hook size if needed.
Tips Before You Start
- Use stitch markers to mark the armhole and neck openings before seaming—this keeps the openings even and symmetrical.
- The mesh pattern is very stretchy, so do not pull the fabric while measuring; lay it flat and relaxed.
- Keep your chain-1 spaces loose and consistent so the mesh remains airy and even.
- Cotton yarn gives the best drape and stitch definition for this openwork design; block the finished pieces gently to open up the mesh.
Step-by-Step Instructions
Front and Back Panels (Make 2)
Row 1: Ch 72 (multiple of 4). Dc in 4th ch from hook (counts as first dc and ch-1 space), *ch 1, skip next ch, dc in next ch; repeat from * to end, turn. (36 dc, 35 ch-1 spaces)
Row 2: Ch 3 (counts as dc), dc in first ch-1 space, *ch 1, dc in next ch-1 space; repeat from * to end, turn. (36 dc, 35 ch-1 spaces)
Rows 3–50: Repeat Row 2. (36 dc, 35 ch-1 spaces) Fasten off. Piece should measure approximately 20 inches from beginning.
Sleeves (Make 2)
Row 1: Ch 36 (multiple of 4). Dc in 4th ch from hook (counts as first dc and ch-1 space), *ch 1, skip next ch, dc in next ch; repeat from * to end, turn. (18 dc, 17 ch-1 spaces)
Row 2: Ch 3 (counts as dc), dc in first ch-1 space, *ch 1, dc in next ch-1 space; repeat from * to end, turn. (18 dc, 17 ch-1 spaces)
Rows 3–45: Repeat Row 2. (18 dc, 17 ch-1 spaces) Fasten off. Piece should measure approximately 18 inches from beginning.
Assembly and Finishing
Lay the front and back panels flat with right sides together, aligning side edges and shoulder edges. Place stitch markers 8 inches in from each outer edge along the top edge of both panels. Sew the shoulder seams from the outer edge to the marker on each side, leaving a 16-inch neck opening in the center. Fasten off. Next, place a stitch marker 8 inches down from the top edge on each side of both panels to mark the armholes. Sew the side seams from the bottom edge up to the marker on each side, leaving the top 8 inches open for armholes. Fasten off.
Fold each sleeve rectangle in half lengthwise with right sides together and sew the long edges together to form a tube. Repeat for the second sleeve, then turn both sleeves right side out. With the body right side out, pin each sleeve tube to an armhole opening, matching the sleeve seam to the side seam and easing the sleeve cap into the armhole. Sew the sleeve to the body around the armhole. Repeat for the second sleeve. Weave in all loose ends.
Edging: With right side facing, join yarn at the neckline. Work 1 round of single crochet evenly around the neck opening, then fasten off. Work 1 round of single crochet evenly around each sleeve cuff and around the bottom hem. Weave in ends. Gently block the finished sweater to open the mesh and even out the stitches.
Pro Tips and Variations
- For a cropped version, work fewer body rows (around 40) and adjust the side seam length accordingly.
- Try a contrasting color for the neckline, cuff, and hem edging to add a subtle design detail.
- Use a slightly larger hook (5.5 mm) for an even airier mesh, or a smaller hook (4.5 mm) for a denser fabric.


