Crochet Elegant Textured Basket and Coaster Set Free Pattern
Crochet Elegant Textured Basket and Coaster Set Free Pattern
Introduction
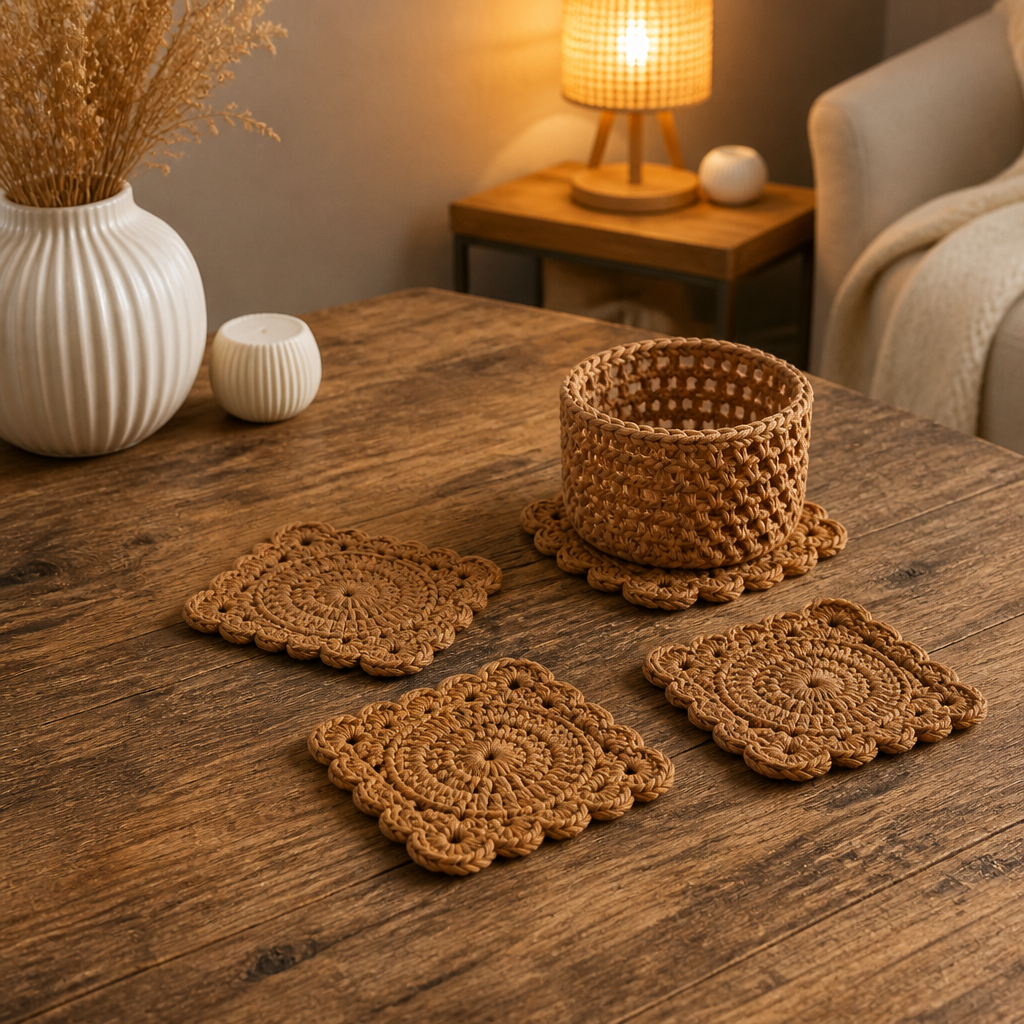
This elegant basket and coaster set is the perfect beginner-friendly project for anyone who wants to add a touch of handmade warmth to their home. Worked in a rich, earthy brown yarn, the set features a crisp-edged basket with a delicate scalloped rim and three matching square coasters with a textured center motif.
The basket is sturdy enough to hold small treasures on a shelf or table, while the coasters protect your surfaces with style. The front post stitches in the coaster centers add a subtle, sophisticated texture that looks far more complicated than it is.
If you can crochet a double crochet and a single crochet, you can make this set. Let's get started!
Materials Needed
- Yarn: Light worsted #3 weight yarn in warm brown, approximately 150 yards total for the set
- Hook: 5.00 mm (H-8) crochet hook
- Notions: Scissors, yarn needle, stitch marker (optional, for marking rounds)
- Finished size: Basket approximately 5 inches in diameter and 3 inches tall; each coaster approximately 4 inches square
Abbreviations
- ch — chain
- sc — single crochet
- dc — double crochet
- fpdc — front post double crochet (worked around the post of the stitch below, from front to back)
- sk — skip
- sl st — slip stitch
- st(s) — stitch(es)
- rnd — round
Gauge
16 dc and 8 rounds = 4 inches (10 cm) in double crochet worked in the round. To check, crochet a small swatch in the round and measure a 4-inch section; if your stitches are larger or smaller, adjust your hook size.
Tips Before You Start
- Use a stitch marker to mark the first stitch of each round, especially in the basket base where the rounds can be tricky to track.
- Keep your tension even and slightly firm so the basket holds its shape and stands upright.
- When working Round 5 of the basket, be sure to work into the back loop only — this creates the crisp fold that defines the base from the sides.
- For the coasters, the fpdc stitches are worked around the post of the stitch below; take your time to keep the texture neat and consistent.
Step-by-Step Instructions
Basket (approximately 5 inches diameter, 3 inches tall)
Rnd 1: Start with a magic ring, ch 1, 12 dc into the ring, sl st to first dc to join (12 dc).
Rnd 2: Ch 2 (counts as dc), dc in same st, 2 dc in each st around, sl st to top of ch-2 (24 dc).
Rnd 3: Ch 2, *dc in next st, 2 dc in next st*, repeat * to * around, sl st to top of ch-2 (36 dc).
Rnd 4: Ch 2, *dc in next 2 sts, 2 dc in next st*, repeat * to * around, sl st to top of ch-2 (48 dc). Base should measure approximately 5 inches in diameter. Do not increase further.
Rnd 5 (Sides): Ch 2, dc in back loop only of each st around, sl st to top of ch-2 (48 dc). This creates a crisp edge for the sides.
Rnds 6-10: Ch 2, dc in each st around, sl st to top of ch-2 (48 dc). After Round 10, sides should measure approximately 3 inches tall.
Rnd 11 (Scalloped Edging): Ch 1, sc in same st, *sk next st, 5 dc in next st (shell made), sk next st, sc in next st*, repeat * to * around, ending with sl st to first sc (12 shells).
Finish off and weave in ends.
Coasters (make 3, each approximately 4 inches square)
Each coaster is worked in joined rounds, with corner shaping to create a square. The center motif is textured with post stitches.
Rnd 1 (Center Motif): Start with a magic ring, ch 2 (counts as first dc), 11 dc into the ring, sl st to top of ch-2 to join (12 dc).
Rnd 2 (Textured Center): Ch 2 (counts as first dc), dc in same st, *fpdc around next st, 2 dc in next st*, repeat * to * around, sl st to top of ch-2 (18 sts: 12 dc and 6 fpdc).
Rnd 3 (Square Shaping): Ch 2 (counts as first dc), dc in next 2 sts, *3 dc in next st (corner), dc in next 3 sts*, repeat * to * around, sl st to top of ch-2 (24 dc). This creates four corners.
Rnd 4: Ch 2 (counts as first dc), dc in each st around, working 3 dc in each corner st, sl st to top of ch-2 (36 dc).
Rnd 5: Ch 2 (counts as first dc), dc in each st around, working 3 dc in each corner st, sl st to top of ch-2 (48 dc). Coaster should now measure approximately 4 inches square.
Rnd 6 (Scalloped Edging): Ch 1, sc in same st, *sk next st, 5 dc in next st (shell made), sk next st, sc in next st*, repeat * to * around, working shells along the edges and at corners as needed to maintain square shape, sl st to first sc (approximately 12 shells).
Finish off and weave in ends. Repeat Rnds 1-6 to make a total of 3 coasters.
Assembly and Finishing
Weave in all remaining ends with your yarn needle, working them into the wrong side of the fabric. Block the basket and coasters to shape: mist lightly with water, pin the coasters into squares and the basket into a round, and allow to dry completely. This helps the scalloped edges lie flat and the basket hold its shape.
Pro Tips and Variations
- Try a contrasting color for the scalloped edging to make the shells pop.
- Make a larger basket by continuing the increase rounds in pattern before starting the sides.
- Add a small loop to the coaster edging to turn one into a hanging ornament or gift tag.


