Linen Stitch Honeycomb Hot Pad Free Knit Pattern
Introduction
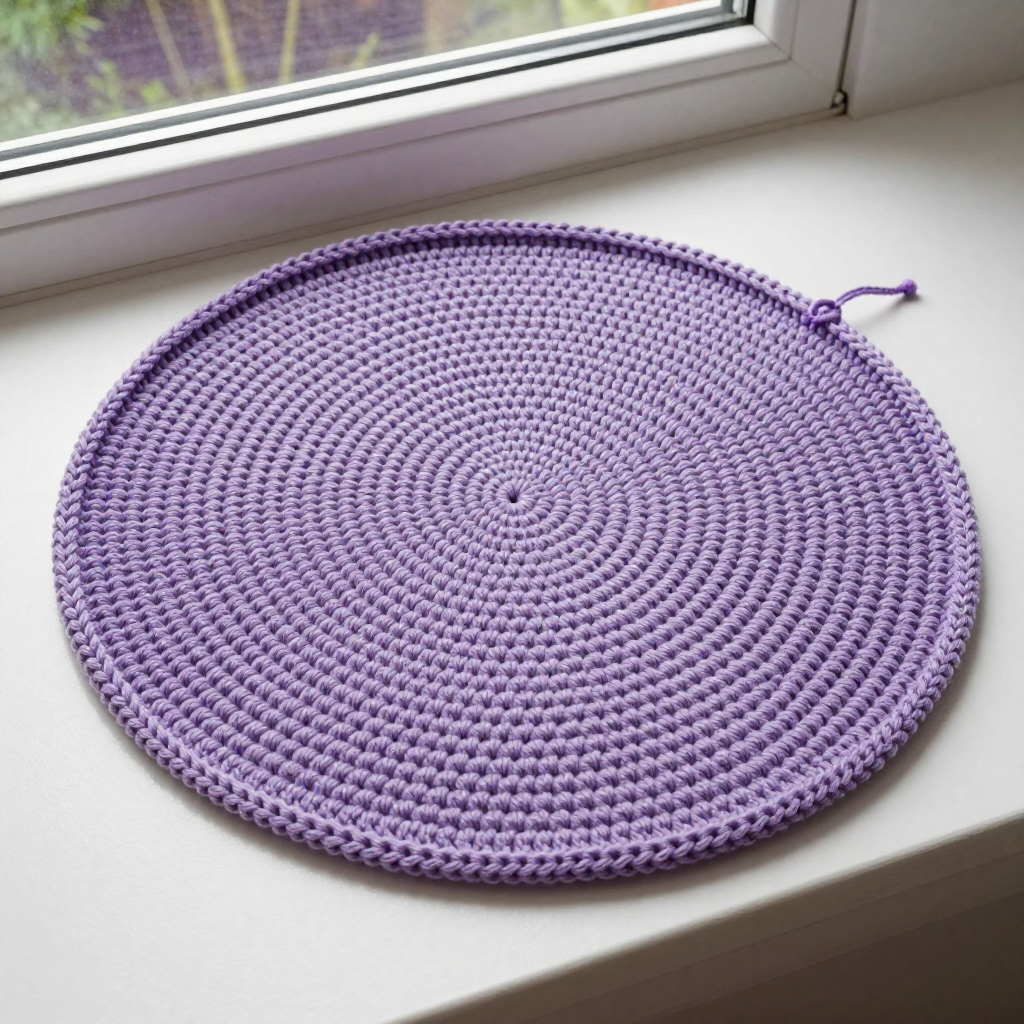
This round hot pad is a lovely little project for anyone who wants to try linen stitch without committing to a large garment. Worked from the center outward in soft lilac t-shirt yarn, it builds a dense, slightly pebbled surface that looks a bit like a woven honeycomb and feels satisfyingly thick in the hand. Because it is small and grows quickly, it is a great confidence-builder for newer knitters and a relaxing, nearly mindless knit for experienced ones. Finished at about 20 cm (8") across, it protects your table in style and makes a cheerful, handmade gift for a kitchen-loving friend.
Materials Needed
- Yarn: T-shirt yarn (approx. 5–7 mm wide), 100% cotton, lilac — 70–80 yards (65–75 m), which is one small skein.
- Needles: 6.0 mm (US J-10) circular needle with a 40 cm (16") cable, or a set of 6.0 mm double-pointed needles.
- Notions: Stitch marker, tapestry needle for weaving in ends, scissors.
- Finished size: Approx. 20 cm (8") diameter.
Abbreviations
- st(s): stitch(es).
- K: knit — insert the needle through the front of the stitch and pull the yarn through.
- Slip 1 wyif: slip one stitch purlwise with the yarn held in front of the work (the stitch moves to the right needle without being worked, and the yarn waits on the side facing you).
- Yo: yarn over — wrap the yarn once around the right needle to create a new stitch and a small increase.
- Rnd(s): round(s) — one full pass around the circle.
- Inc: increase — here, each increase is made with a yarn over.
Gauge
12 sts and 24 rows = 10 cm (4") in linen stitch pattern. Knit a small swatch in the round and measure a 10 cm section; if you have more stitches than 12, go up a needle size, and if you have fewer, go down.
Tips Before You Start
- T-shirt yarn is stretchy and splits easily, so keep your tension relaxed and let the needle tip do the work rather than tugging.
- The slipped stitches create the honeycomb texture — always slip purlwise so the stitch doesn't twist.
- Keep the yarn in front for every slip; if it drifts to the back, the woven look disappears.
- Count your stitches after each increase round so the disc stays flat and even.
Step-by-Step Instructions
Center and Body
Using the circular needle and lilac yarn, cast on 8 sts using Emily Ocker's circular cast-on. Join to work in the round, being careful not to twist, and place a marker for the beginning of round.
Set-up rnd: [K1, yo] around (16 sts).
Rnd 1: [K1, slip 1 wyif] around (16 sts).
Rnd 2: [Slip 1 wyif, k1] around (16 sts).
Rnd 3: [K1, yo, slip 1 wyif] around (24 sts).
Rnd 4: [K1, slip 1 wyif, k1] around (24 sts).
Rnd 5: [Slip 1 wyif, k1, slip 1 wyif] around (24 sts).
Rnd 6: [K1, slip 1 wyif, k1, yo] around (32 sts).
Rnd 7: [K1, slip 1 wyif] around (32 sts).
Rnd 8: [Slip 1 wyif, k1] around (32 sts).
Rnd 9: [K1, slip 1 wyif, k1, slip 1 wyif, k1, yo] around (40 sts).
Rnd 10: [K1, slip 1 wyif] around (40 sts).
Rnd 11: [Slip 1 wyif, k1] around (40 sts).
Rnd 12: [K1, slip 1 wyif, k1, slip 1 wyif, k1, slip 1 wyif, k1, yo] around (48 sts).
Rnd 13: [K1, slip 1 wyif] around (48 sts).
Rnd 14: [Slip 1 wyif, k1] around (48 sts).
Rnd 15: [K1, slip 1 wyif, k1, slip 1 wyif, k1, slip 1 wyif, k1, slip 1 wyif, k1, yo] around (56 sts).
Rnd 16: [K1, slip 1 wyif] around (56 sts).
Rnd 17: [Slip 1 wyif, k1] around (56 sts).
Rnd 18: [K1, slip 1 wyif, k1, slip 1 wyif, k1, slip 1 wyif, k1, slip 1 wyif, k1, slip 1 wyif, k1, yo] around (64 sts).
Rnd 19: [K1, slip 1 wyif] around (64 sts).
Rnd 20: [Slip 1 wyif, k1] around (64 sts).
Rnd 21: [K1, slip 1 wyif, k1, slip 1 wyif, k1, slip 1 wyif, k1, slip 1 wyif, k1, slip 1 wyif, k1, slip 1 wyif, k1, yo] around (72 sts).
Rnd 22: [K1, slip 1 wyif] around (72 sts).
Rnd 23: [Slip 1 wyif, k1] around (72 sts).
Rnd 24: [K1, slip 1 wyif, k1, slip 1 wyif, k1, slip 1 wyif, k1, slip 1 wyif, k1, slip 1 wyif, k1, slip 1 wyif, k1, slip 1 wyif, k1, yo] around (80 sts).
Rnd 25: [K1, slip 1 wyif] around (80 sts).
Rnd 26: [Slip 1 wyif, k1] around (80 sts).
Rnd 27: [K1, slip 1 wyif, k1, slip 1 wyif, k1, slip 1 wyif, k1, slip 1 wyif, k1, slip 1 wyif, k1, slip 1 wyif, k1, slip 1 wyif, k1, slip 1 wyif, k1, yo] around (88 sts).
Rnd 28: [K1, slip 1 wyif] around (88 sts).
Rnd 29: [Slip 1 wyif, k1] around (88 sts).
Rnd 30: [K1, slip 1 wyif, k1, slip 1 wyif, k1, slip 1 wyif, k1, slip 1 wyif, k1, slip 1 wyif, k1, slip 1 wyif, k1, slip 1 wyif, k1, slip 1 wyif, k1, slip 1 wyif, k1, yo] around (96 sts).
Rnd 31: [K1, slip 1 wyif] around (96 sts).
Rnd 32: [Slip 1 wyif, k1] around (96 sts).
Border and Bind-Off
Border rnd: Knit all stitches, increasing 8 sts evenly (104 sts).
Bind off all stitches knitwise.
Optional Hanging Loop
With the right side facing, pick up 3 sts at the edge. Work I-cord for 5 cm (2"), then attach the end back to the edge to form a loop. Weave in ends.
Assembly and Finishing
There is no seaming to do — the hot pad is worked in one piece. Weave in all ends on the wrong side, threading each tail through a few stitches to secure it. Block lightly by misting with water and pinning flat to open up the honeycomb texture, then let it dry completely before use.
Pro Tips and Variations
- Make a set in different colors — mustard, sage, or cream look lovely alongside the lilac.
- Add a second border round in a contrasting cotton for a crisp, modern edge.
- Work a slightly larger version by continuing the increase pattern for a few more rounds to make a matching trivet or small mat.