Retro Floral C2C Baby Blanket Free Pattern
Introduction
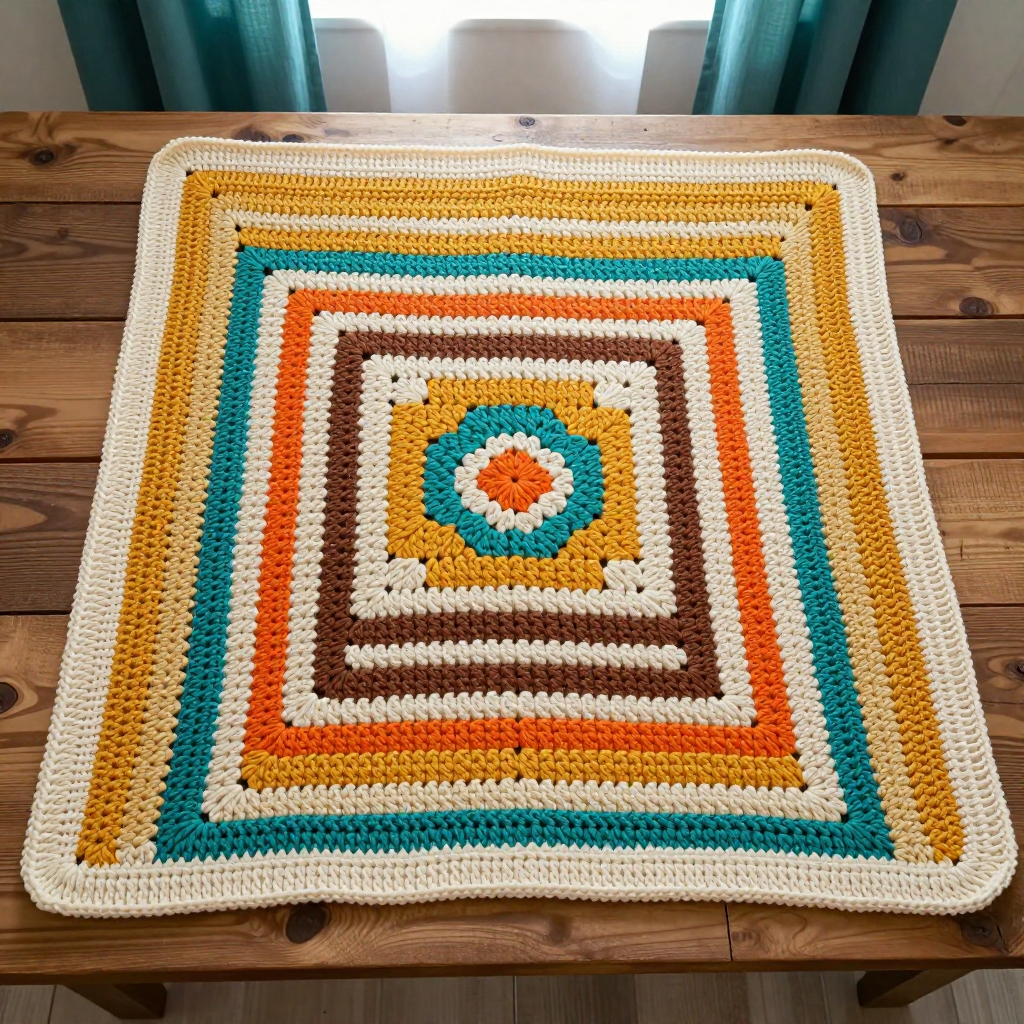
This retro floral C2C baby blanket is a love letter to mid-century modern design, and it's easier to make than it looks. If you can chain and double crochet, you can work corner-to-corner blocks, and the color changes do all the design work for you. The finished blanket is a soft, squishy 30-inch square with a diagonal grid texture, warm mustard and teal bands, and a crisp cream border. It's perfect for a modern nursery, a baby shower gift, or a cozy tummy-time mat, and it looks far more complicated than it is.
Materials Needed
- Yarn: Worsted weight (4) acrylic yarn, approximately 1,200 yards total:
- Color A (Mustard): 400 yards
- Color B (Teal): 300 yards
- Color C (Orange): 200 yards
- Color D (Cream): 200 yards
- Color E (Brown): 100 yards
- Hook: 5.5 mm (I-9) crochet hook
- Notions: Tapestry needle, scissors, stitch markers (optional, for color changes)
- Finished size: Approximately 30 inches by 30 inches (76 cm x 76 cm)
Abbreviations
- ch – chain
- dc – double crochet
- sl st – slip stitch
- sc – single crochet
- sp – space
- st(s) – stitch(es)
- block – one corner-to-corner square made of 3 dc + ch 3
Gauge
8 c2c blocks = 5.5 inches (14 cm). Work a small swatch of blocks and measure across 8 blocks; adjust your hook size if needed to match.
Tips Before You Start
- Change colors at the beginning of a block by finishing the last dc of the previous block with the new color, so the color edge stays clean.
- Carry colors up the side only for short jumps; fasten off and rejoin for longer stretches to avoid a bulky edge.
- Keep your ch-3 spaces consistent — they set the size of every block and therefore the finished blanket.
- Count your blocks at the end of every row; the increase and decrease sections are easy to drift on.
Step-by-Step Instructions
The blanket is worked in corner-to-corner blocks of 3 dc + ch 3. Each block equals one square. Start at the bottom right corner, increase to 44 blocks wide, then decrease. Follow the color chart for the banded floral-inspired motif.
Increase Section (Rows 1–44)
Row 1: With A, ch 6, dc in 4th ch from hook, dc in next 2 ch, ch 3, turn (1 block).
Row 2: Ch 6, dc in 4th ch from hook, dc in next 2 ch, sl st in ch-3 sp of previous block, ch 3, 3 dc in same sp, ch 3, turn (2 blocks).
Rows 3–44: Continue increasing 1 block per row, following the color chart below, until Row 44 is complete (44 blocks).
Decrease Section (Rows 45–87)
Row 45: Sl st in first 3 dc and ch-3 sp, ch 3, 3 dc in next ch-3 sp, continue across, ch 3, turn (43 blocks).
Rows 46–87: Continue decreasing 1 block per row, following the color chart, until Row 87 is complete (1 block). Fasten off.
Color Chart (each cell = 1 block)
- Rows 1–10: A (Mustard)
- Rows 11–14: B (Teal)
- Rows 15–18: A (Mustard)
- Rows 19–22: C (Orange)
- Rows 23–26: A (Mustard)
- Rows 27–30: D (Cream)
- Rows 31–34: A (Mustard)
- Rows 35–38: E (Brown)
- Rows 39–42: A (Mustard)
- Rows 43–44: B (Teal)
This is a simplified representation; the full chart places a floral motif in the center with concentric squares. Adjust colors as desired.
Border
Round 1: With D, sc evenly around the entire blanket, working 3 sc in each corner, join with sl st to first sc.
Round 2: Ch 1, sc in each sc around, 3 sc in each corner, join.
Round 3: Ch 1, sc in each sc around, 3 sc in each corner, join. Fasten off.
Assembly and Finishing
This blanket is worked as one piece, so no seaming is needed. Weave in all ends along the back of the work, changing direction every few stitches so they stay secure. Block lightly to 30 x 30 inches (76 x 76 cm): mist with water, pin to measurements on a mat, and let dry fully so the border and corners lie flat.
Pro Tips and Variations
- Swap the palette for a softer nursery look: blush, sage, cream, and taupe keep the retro feel with less contrast.
- Add a fourth border round in Color B for a teal frame that ties the bands together.
- Make a larger throw by increasing to 60 blocks wide and mirroring the decrease; add extra yarn accordingly.


