Three-Square Plaid Banner Crochet Free Pattern
Introduction
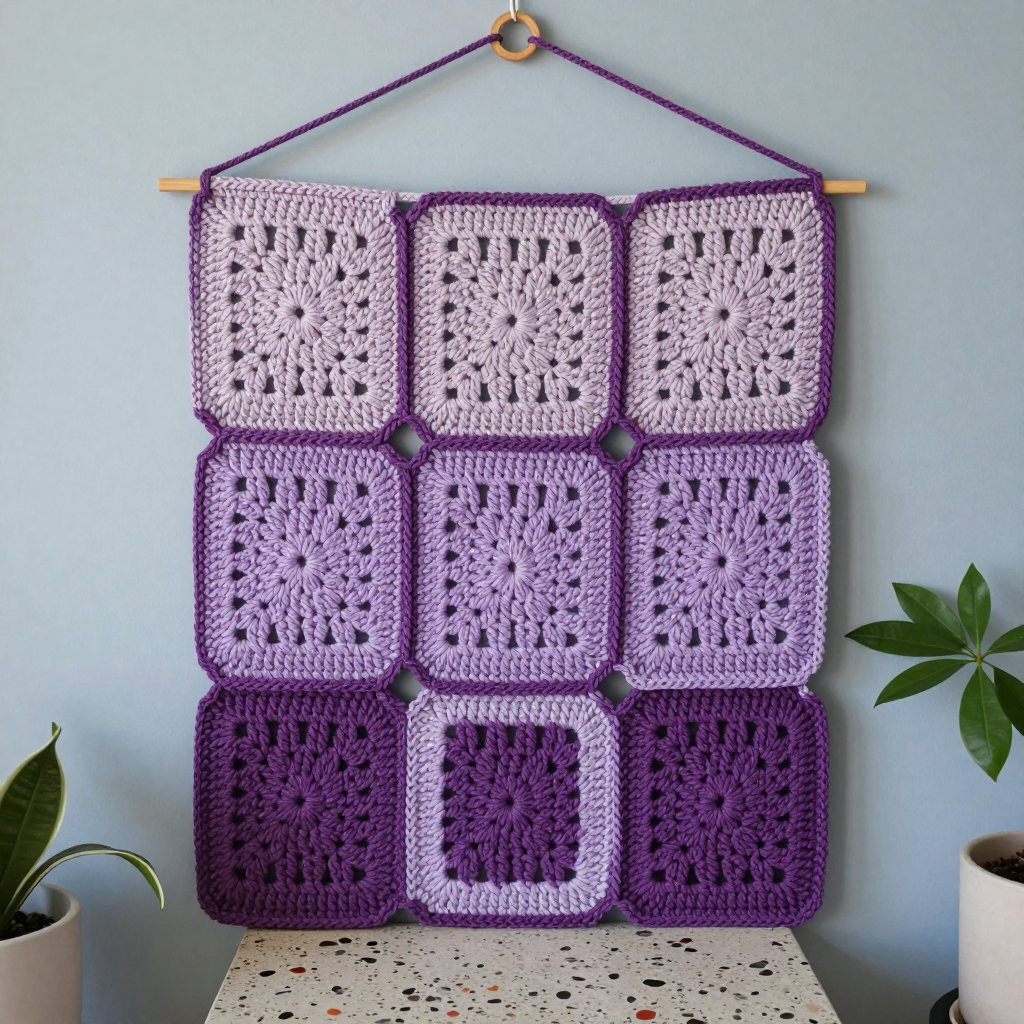
This Three-Square Plaid Banner is a sweet, beginner-friendly crochet wall hanging that comes together in an afternoon. It is made from three solid granny squares in graduated lilac shades, stacked vertically and edged in a contrasting lilac to create a soft plaid grid effect. Worked entirely in double crochet with simple color changes, it is a wonderful first project for anyone new to granny squares. The super bulky chenille-style yarn makes it squishy, plush, and cozy, while the monochrome lilac palette keeps it calm and modern. Hang it from a small wooden ring in a nursery, entryway, or above a desk for a handmade touch.
Materials Needed
- Yarn: Super bulky (weight 6) chenille-style polyester, approx. 90 yds total:
- Color A (pale lilac): 30 yds
- Color B (medium lilac): 30 yds
- Color C (deep lilac): 20 yds
- Color D (lilac contrast for edging and joining): 10 yds
- Hook: 8.0 mm (US L-11)
- Notions: Tapestry needle, scissors, stitch marker, small wooden ring (approx. 1.5–2 in / 4–5 cm)
- Finished size: Approx. 6 in (15 cm) wide x 19 in (48 cm) tall including hanging ring
Abbreviations
- ch – chain
- dc – double crochet
- sc – single crochet
- sl st – slip stitch
- sp / sps – space / spaces
- MR – magic ring
- rep – repeat
- st / sts – stitch / stitches
Gauge
6 dc x 3 rows = 4 in (10 cm) in solid granny square; each finished square measures approx. 6 x 6 in (15 x 15 cm). Check your gauge by working one square and measuring it before continuing.
Tips Before You Start
- Chenille yarn can shed and worm, so keep your tension relaxed and avoid over-frogging; the plush texture hides small imperfections.
- Use a stitch marker in the first stitch of each round so you always know where to join.
- Count your 3-dc groups after every round; each square should end with 36 dc.
- Keep color changes neat by fastening off at the end of each square and weaving ends securely into the wrong side.
Step-by-Step Instructions
Square 1 (Color A)
R1: Make a magic ring, ch3, 2 dc into ring, [ch2, 3 dc] x3, ch2, sl st to top of ch3 (12 dc, 4 ch2 sps).
R2: Sl st to corner sp, ch3, [2 dc, ch2, 3 dc] in corner sp, *ch1, [3 dc, ch2, 3 dc] in next corner sp, rep from * around, ch1, sl st to top of ch3 (24 dc, 4 ch1 sps).
R3: Sl st to corner sp, ch3, [2 dc, ch2, 3 dc] in corner sp, *ch1, 3 dc in next ch1 sp, ch1, [3 dc, ch2, 3 dc] in next corner sp, rep from * around, ch1, sl st to top of ch3 (36 dc). Fasten off.
Square 2 (Color B)
Rep Square 1 R1–3. Fasten off.
Square 3 (Color C)
Rep Square 1 R1–3. Fasten off.
Edging (Color D)
Join D to any corner sp of Square 1, ch1, sc evenly around entire square working 1 sc in each dc and 1 sc in each ch1 sp, 3 sc in each corner sp, sl st to first sc. Fasten off. Rep edging on Squares 2 and 3.
Assembly
Whipstitch or sc-join Square 1 to Square 2 along bottom/top edges, then Square 2 to Square 3, all with D, forming a vertical stack.
Hanging Loop
Join D at top-left corner of Square 1, ch10, sl st to top-right corner to form hanging loop.
Assembly and Finishing
Weave in all ends securely on the wrong side, taking care not to pull the chenille too tight. Block lightly by misting with water and pinning each square to shape, then allow to dry completely before joining if you prefer crisp edges. Slip the wooden ring through the hanging loop at the top of the banner.
Pro Tips and Variations
- Swap the lilac shades for any three-color gradient (blush, sage, or ocean blues) to match your room.
- Add a fringe of short D strands along the bottom edge for a boho look.
- Make a longer banner by adding more squares in a fourth shade and joining them in the same vertical stack.


