Wheat Sheaf Granny Square Free Crochet Pattern
Introduction
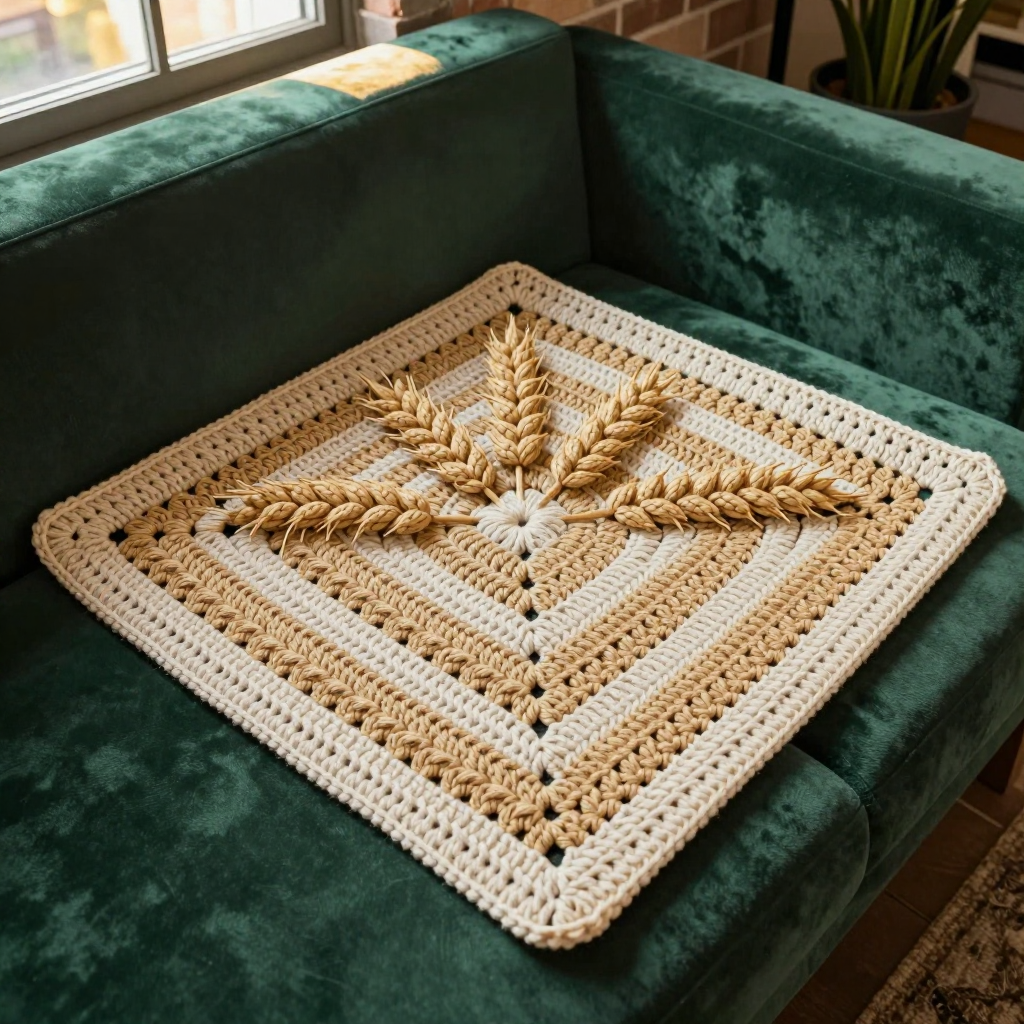
The Wheat Sheaf Granny Square is a warm, earthy block that looks far more intricate than it is. It's written for beginners: if you can make a double crochet and a treble crochet, you can make this square. The design pairs simple striped rounds in barley and oat with a central fan of three-tall-stitch clusters that resemble a sheaf of wheat, so the finished square feels calm, natural, and a little bit special. Worked in worsted-weight acrylic, it's soft but sturdy, about 6 inches (15 cm) square, and quick enough to make a whole blanket's worth in a weekend.
Materials Needed
- Yarn: Worsted weight (4) acrylic yarn, approximately 30 yards total: 15 yards barley (A), 15 yards oat (B)
- Hook: 6.0 mm (J/10) crochet hook
- Notions: Tapestry needle for weaving in ends, scissors, and a stitch marker (optional, helpful for marking the first stitch of a round)
- Finished size: 6 inches (15 cm) square
Abbreviations
- ch – chain: make a loop of yarn and pull it through the loop on your hook.
- sl st – slip stitch: insert hook, yarn over, pull through both the stitch and the loop on your hook.
- sc – single crochet: insert hook, yarn over, pull up a loop, yarn over, pull through both loops.
- dc – double crochet: yarn over, insert hook, pull up a loop, yarn over, pull through two loops, yarn over, pull through the last two loops.
- tr – treble crochet: yarn over twice, insert hook, pull up a loop, then yarn over and pull through two loops three times.
- sp – space: the gap formed by a chain (for example, a ch-2 sp).
- beg – beginning.
- rep – repeat.
Gauge
The first 3 rounds should measure 3 inches (7.5 cm) square. To check, work Rounds 1–3, lay the piece flat without stretching it, and measure across; if it's larger, go down a hook size, and if it's smaller, go up a hook size.
Tips Before You Start
- Count your 3-dc groups after every round. Each corner space holds two groups, and each ch-1 space holds one, so the stitch count grows predictably and mistakes are easy to spot.
- When you join a new color, join it in a corner ch-2 space so the join hides in the corner rather than along a straight edge.
- The wheat sheaf is worked last, directly into the four ch-2 spaces of Round 1. Keep those spaces loose enough to fit your hook through comfortably.
- Fasten off with a tail of at least 4 inches so you have plenty of yarn to weave in securely.
Step-by-Step Instructions
Base Square – Center (A)
Rnd 1: With A, ch 4, join with sl st to form a ring. Ch 3 (counts as dc), 2 dc in ring, ch 2, [3 dc in ring, ch 2] 3 times, join with sl st to top of beg ch-3 (12 dc, 4 ch-2 sps). Fasten off A.
Base Square – Round 2 (B)
Rnd 2: Join B with sl st in any ch-2 sp, ch 3 (counts as dc), 2 dc in same sp, ch 2, 3 dc in same sp (corner made), *ch 1, (3 dc, ch 2, 3 dc) in next ch-2 sp; rep from * around, ch 1, join with sl st to top of beg ch-3 (24 dc, 4 ch-2 sps, 4 ch-1 sps). Fasten off B.
Base Square – Round 3 (A)
Rnd 3: Join A with sl st in any ch-2 sp, ch 3 (counts as dc), 2 dc in same sp, ch 2, 3 dc in same sp, *ch 1, 3 dc in next ch-1 sp, ch 1, (3 dc, ch 2, 3 dc) in next ch-2 sp; rep from * around, ch 1, join with sl st to top of beg ch-3 (36 dc, 4 ch-2 sps, 8 ch-1 sps). Do not fasten off.
Base Square – Round 4 (A)
Rnd 4: Ch 1, sc in each dc and ch-1 sp around, working (sc, ch 2, sc) in each ch-2 sp, join with sl st to first sc (52 sc, 4 ch-2 sps). Fasten off A.
Wheat Sheaf Center (B)
Rnd 1: Join B with sl st in any ch-2 sp of Round 1. *Ch 4 (counts as tr), 2 tr in same sp, ch 2, 3 tr in same sp (cluster made), ch 1, skip next 3-dc group, sc in next ch-2 sp, ch 1; rep from * around, join with sl st to top of beg ch-4 (4 clusters, 4 sc). Fasten off B.
Assembly and Finishing
This square is worked in one piece, so there is no seaming. Weave in all ends on the wrong side with your tapestry needle, running each tail under several stitches and back through itself to lock it. Block the square by misting it lightly and pinning it to 6 inches (15 cm) square on a mat; let it dry completely. If you're joining squares into a blanket, block them all to the same size first so the seams lie flat.
Pro Tips and Variations
- Change the palette: Swap barley and oat for any two neutrals, or use a soft sage and cream for a garden-inspired look.
- Make it bigger: Add extra dc rounds in the same corner pattern (3 dc, ch 2, 3 dc at each corner, 3 dc in each ch-1 sp along the sides) to grow the square to any size.
- Use it as a motif: Join finished squares with a simple sc seam for a blanket, or make four and seam them into a pillow front.