Ballet Ribbon Chevron Candle Wrap Free Crochet Pattern
Introduction
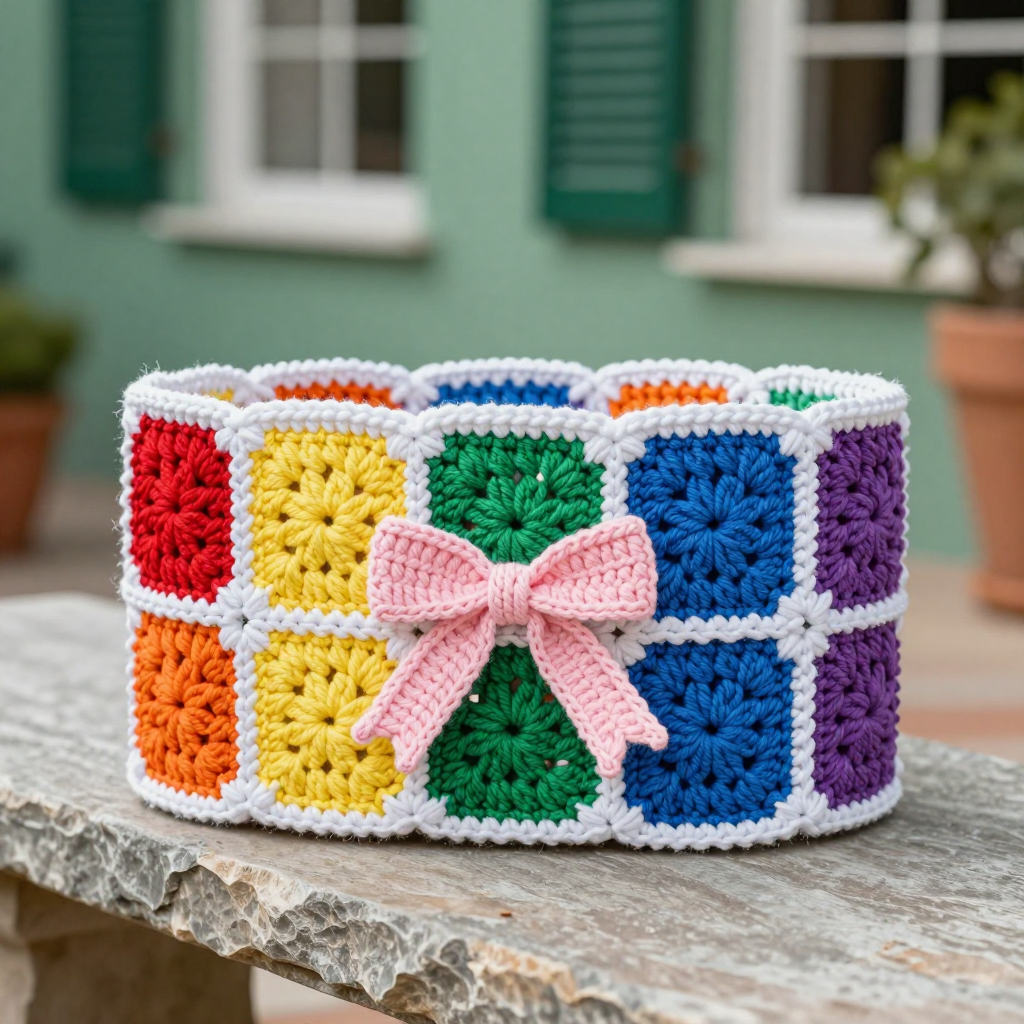
This Ballet Ribbon Chevron Candle Wrap is a sweet little project for anyone who has mastered the basic granny square and wants to make something pretty and useful. Six bright rainbow squares are worked in soft velvet yarn, joined into a single row, and wrapped around a standard candle jar to make a cozy that glows warmly through the open lacy gaps. The pale pink chain bow at the front gives it that soft ballet-core look, and the velvet texture makes it feel plush and luxurious in the hand. It works up quickly, uses only small amounts of each color, and makes a lovely gift or a cheerful addition to your own home decor.
Materials Needed
- Yarn: Worsted weight (category 4) velvet yarn, 100% polyester, approx. 150 yds total: 20 yds each of 6 rainbow brights (red, orange, yellow, green, blue, purple), 20 yds pale pink, 10 yds white
- Hook: 5.0 mm (H-8) crochet hook
- Notions: Tapestry needle, scissors, stitch marker (optional), measuring tape
- Finished size: Approx. 14" circumference x 3.5" height (35.5 cm x 9 cm), fits a standard 16 oz candle jar
Abbreviations
- ch — chain
- sl st — slip stitch
- sc — single crochet
- dc — double crochet
- sp — space
- beg — beginning
- rep — repeat
- WS — wrong side
Gauge
1 granny square = 3.5" x 3.5" (9 cm x 9 cm) after blocking. Work one square first and measure it; if it is larger than 3.5", drop to a 4.5 mm hook, and if it is smaller, move up to a 5.5 mm hook.
Tips Before You Start
- Velvet yarn has a nap and can shed slightly, so keep your tension relaxed and avoid frogging repeatedly — the fibers can mat if worked over too many times.
- Work each square in a single color and fasten off cleanly; the solid blocks are what create the rainbow chevron effect when the squares are lined up.
- Count your 3-dc clusters at the end of each round — each square should finish with 36 dc, which keeps every square the same size for easy seaming.
- Block your squares lightly before joining so the edges lie flat and the rectangle seams evenly.
Step-by-Step Instructions
Square (make 4, one each in red, orange, yellow, green)
With first color, ch 4, join with sl st to form ring.
R1: Ch 3 (counts as dc), 2 dc in ring, [ch 2, 3 dc in ring] 3 times, ch 2, join with sl st to top of beg ch-3 (12 dc, 4 ch-2 sps).
R2: Ch 3, 2 dc in same sp, ch 2, 3 dc in same sp (corner made), *ch 1, [3 dc, ch 2, 3 dc] in next ch-2 sp; rep from * around, ch 1, join with sl st to top of beg ch-3 (24 dc, 4 ch-1 sps, 4 ch-2 sps).
R3: Ch 3, 2 dc in same sp, ch 2, 3 dc in same sp, *ch 1, 3 dc in next ch-1 sp, ch 1, [3 dc, ch 2, 3 dc] in next ch-2 sp; rep from * around, ch 1, join with sl st to top of beg ch-3 (36 dc, 8 ch-1 sps, 4 ch-2 sps).
Fasten off. Weave in ends.
Square (make 2, one each in blue, purple)
Work as above, following R1–R3 exactly.
Assembly
Arrange squares in a row: red, orange, yellow, green, blue, purple. With WS facing, whipstitch or sc seam squares together along vertical edges to form a rectangle (6 squares wide x 1 square high).
Edging
With white, join yarn at any corner of rectangle.
R1: Sc evenly around entire outer edge, working 3 sc in each corner. Join with sl st. Fasten off.
Bow (pale pink)
Ch 40. Sl st in 2nd ch from hook and in each ch across. Fasten off, leaving a 6" tail. Shape into a bow: fold chain in half, bring ends to center, and wrap tail around center several times to secure. Sew bow to front center of wrap.
Finishing
Wrap rectangle around jar, overlapping ends by 1" (2.5 cm). Sew or crochet seam to join. Weave in all ends. Block lightly.
Assembly and Finishing
Seam the six squares into a single row first, then join the short ends to form the cylinder, overlapping by 1" as described. Weave in every tail on the wrong side, using the tapestry needle to tuck ends into the clusters so they don't show through the lacy gaps. Block the finished wrap lightly by misting with water and shaping it around the jar (or a similar cylinder) to dry, which helps the velvet relax and the seams lie flat.
Pro Tips and Variations
- Swap the rainbow order for a soft pastel gradient to lean further into the ballet-core look.
- Use a contrasting color for the edging, such as pale pink instead of white, to tie the bow in more closely.
- Add a small button or crochet flower at the bow center for extra detail, or make a second wrap in a single color for a minimalist version.