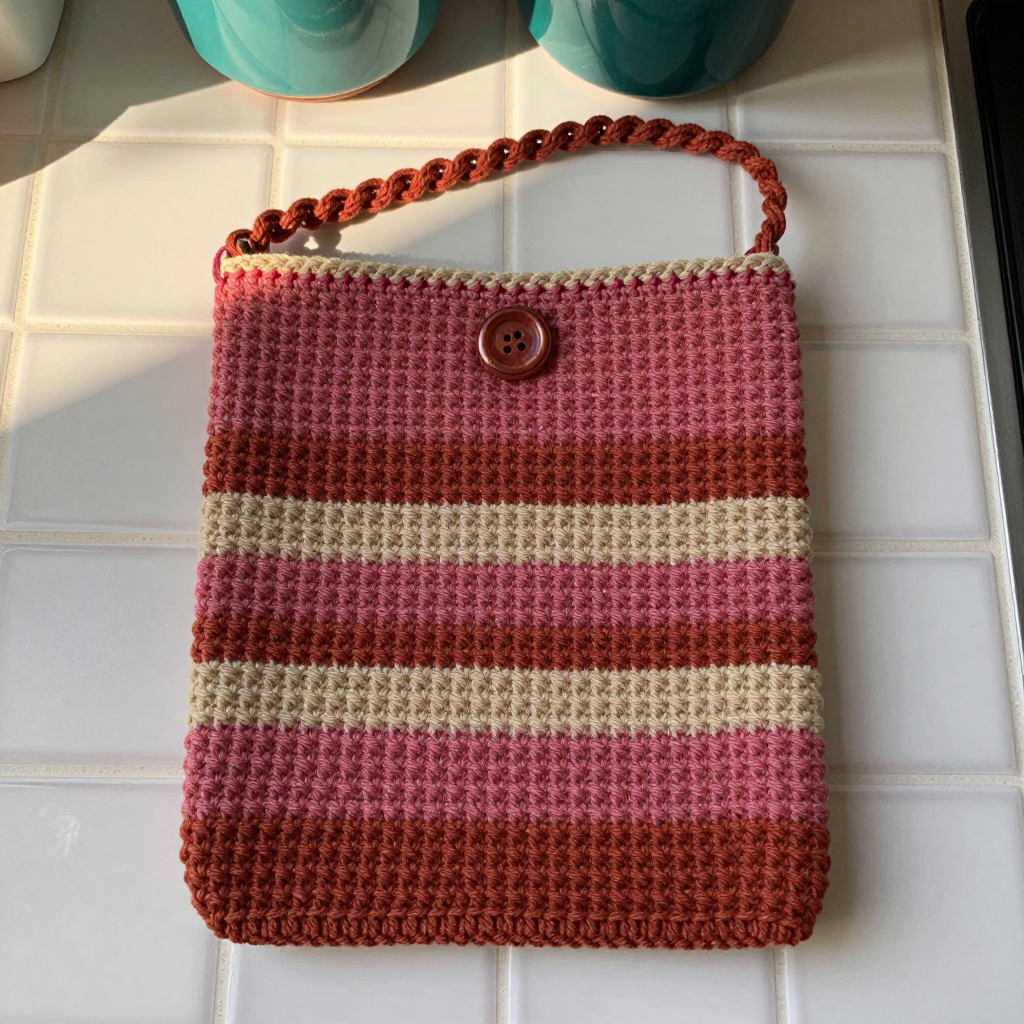
Cabin Plaid Pencil Bag Free Crochet Pattern

Introduction
This Cabin Plaid Pencil Bag is a cozy little project for anyone who loves a classic plaid look without any fussy colorwork. It's a great fit for confident beginners and intermediate crocheters who are comfortable with single crochet and simple color changes. The dense single crochet fabric gives it a sturdy, slightly ridged texture that feels satisfying in the hand, while the burgundy and gold stripes give it that warm, cabin-inspired charm. At about 9.5 inches wide and 4 inches tall, it's just right for pens, pencils, or small notions, and the zippered top keeps everything secure.
Materials Needed
- Yarn: Worsted weight (4) acrylic yarn — 100 yds burgundy (Color A), 50 yds gold (Color B)
- Hook: 4 mm (G/6)
- Notions: 7-inch zipper, matching sewing thread and needle, yarn needle, scissors, stitch markers (optional)
- Finished size: 9.5 inches wide x 4 inches tall x 2 inches deep
Abbreviations
- ch — chain: make a loop of yarn and pull it through the loop on your hook.
- sc — single crochet: insert hook into stitch, yarn over, pull up a loop, yarn over, pull through both loops.
- sl st — slip stitch: insert hook into stitch, yarn over, pull through both loops on hook at once.
- st(s) — stitch(es)
- A / B — Color A (burgundy) / Color B (gold)
Gauge
4 stitches x 4 rows = 1 inch in single crochet. To check, crochet a small swatch and measure a 1-inch section; adjust your hook size if needed to match.
Tips Before You Start
- Change colors on the last stitch of the row (pull the new color through the final two loops) so the stripe edge stays clean.
- Keep your tension even — the bag is folded and seamed, so consistent rows make the side seams line up neatly.
- Count your stitches at the end of every row; you should always have 38 stitches.
- Leave a long tail in Color A for seaming the sides and working the top edging.
Step-by-Step Instructions
Bag Body
The bag is worked in one flat piece, then folded and seamed. All rows are single crochet; only the color changes.
Setup: With A, ch 39.
Row 1: Sc in 2nd ch from hook and each ch across (38 sts).
Row 2: Ch 1, turn, sc in each st across (38 sts).
Row 3: Ch 1, turn, sc in each st across (38 sts). Change to B.
Row 4: Ch 1, turn, sc in each st across (38 sts). Change to A.
Rows 5-6: Ch 1, turn, sc in each st across (38 sts). Change to B.
Row 7: Ch 1, turn, sc in each st across (38 sts). Change to A.
Rows 8-9: Ch 1, turn, sc in each st across (38 sts). Change to B.
Row 10: Ch 1, turn, sc in each st across (38 sts). Change to A.
Rows 11-12: Ch 1, turn, sc in each st across (38 sts). Change to B.
Row 13: Ch 1, turn, sc in each st across (38 sts). Change to A.
Rows 14-15: Ch 1, turn, sc in each st across (38 sts). Change to B.
Row 16: Ch 1, turn, sc in each st across (38 sts). Change to A.
Rows 17-18: Ch 1, turn, sc in each st across (38 sts). Change to B.
Row 19: Ch 1, turn, sc in each st across (38 sts). Change to A.
Rows 20-21: Ch 1, turn, sc in each st across (38 sts). Change to B.
Row 22: Ch 1, turn, sc in each st across (38 sts). Change to A.
Rows 23-24: Ch 1, turn, sc in each st across (38 sts). Change to B.
Row 25: Ch 1, turn, sc in each st across (38 sts). Change to A.
Rows 26-27: Ch 1, turn, sc in each st across (38 sts). Change to B.
Row 28: Ch 1, turn, sc in each st across (38 sts). Change to A.
Rows 29-30: Ch 1, turn, sc in each st across (38 sts). Change to B.
Row 31: Ch 1, turn, sc in each st across (38 sts). Change to A.
Rows 32-33: Ch 1, turn, sc in each st across (38 sts). Change to B.
Row 34: Ch 1, turn, sc in each st across (38 sts). Change to A.
Rows 35-36: Ch 1, turn, sc in each st across (38 sts). Change to B.
Row 37: Ch 1, turn, sc in each st across (38 sts). Change to A.
Rows 38-39: Ch 1, turn, sc in each st across (38 sts). Change to B.
Row 40: Ch 1, turn, sc in each st across (38 sts). Change to A.
Rows 41-42: Ch 1, turn, sc in each st across (38 sts). Change to B.
Row 43: Ch 1, turn, sc in each st across (38 sts). Change to A.
Rows 44-45: Ch 1, turn, sc in each st across (38 sts). Change to B.
Row 46: Ch 1, turn, sc in each st across (38 sts). Change to A.
Rows 47-48: Ch 1, turn, sc in each st across (38 sts). Change to B.
Row 49: Ch 1, turn, sc in each st across (38 sts). Change to A.
Rows 50-51: Ch 1, turn, sc in each st across (38 sts). Change to B.
Row 52: Ch 1, turn, sc in each st across (38 sts). Change to A.
Rows 53-54: Ch 1, turn, sc in each st across (38 sts). Change to B.
Row 55: Ch 1, turn, sc in each st across (38 sts). Change to A.
Rows 56-57: Ch 1, turn, sc in each st across (38 sts). Change to B.
Row 58: Ch 1, turn, sc in each st across (38 sts). Change to A.
Rows 59-60: Ch 1, turn, sc in each st across (38 sts). Fasten off.
Side Seams
Fold the piece in half widthwise with right sides together so that Row 1 meets Row 60; the fold forms the bottom of the bag. Using A and a yarn needle, whipstitch each side seam from the fold to the top opening. Turn right side out.
Zipper
Pin the 7-inch zipper along the top opening, aligning the zipper tape with the edges. Sew in place with matching thread and a sewing needle.
Top Edging
With A, join yarn at one side of the top opening. Sc evenly around the entire top edge (about 40 sc), then sl st to the first sc. Fasten off.
Assembly and Finishing
Weave in all ends on the wrong side, securing the color-change tails so they don't work loose. Gently steam-block or lightly mist and shape the bag flat, letting it dry fully before inserting the zipper if you haven't already. Check that the side seams are even and the zipper opens smoothly.
Pro Tips and Variations
- Swap the gold for a cream or forest green to change the plaid mood while keeping the same stripe rhythm.
- Add a thin fabric lining for extra structure and to hide the zipper tape inside.
- Make a matching mini version by chaining fewer stitches for a coin purse.