Folk Duo Stripe Fisherman Jacket Free Knit Pattern
Folk Duo Stripe Fisherman Jacket Free Knit Pattern
Introduction
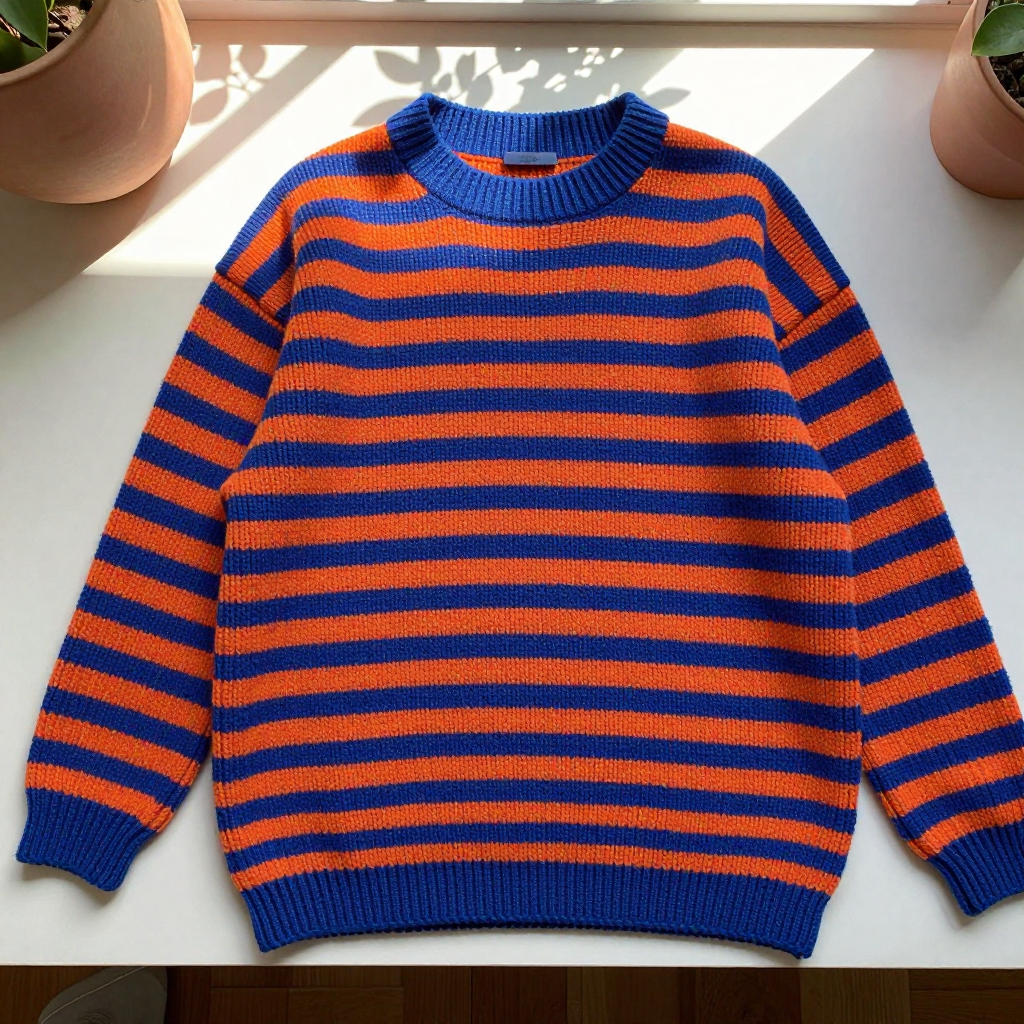
The Folk Duo Stripe Fisherman Jacket is a boxy, flat-panel jacket that looks far more complicated than it is to knit. It is made from simple rectangles and straight tubes, so if you can knit and purl, you can make this jacket. Wide bands of cobalt and orange are worked sideways in fisherman rib, which gives the finished piece a deep, squishy texture and makes the stripes read as bold vertical lines. The alpaca blend yarn makes it warm and soft, and the plain rib collar keeps the look clean and folk-inspired. This pattern is written for experienced beginners who are comfortable with basic shaping and seaming.
Materials Needed
- Yarn: Worsted weight alpaca blend (50% alpaca, 50% wool; 100 g / 200 yd per skein). Cobalt (A): 600 (700, 800) yd. Orange (B): 600 (700, 800) yd.
- Needles: 5.0 mm (US 8) circular needles, 80 cm long, and a set of 5 double-pointed needles in the same size.
- Notions: Stitch markers, a tapestry needle, a tape measure, and a few locking stitch markers or safety pins for holding pieces.
- Finished size: Chest 40 (44, 48) in / 102 (112, 122) cm; length 24 (25, 26) in / 61 (63.5, 66) cm; sleeve length to underarm 18 (19, 20) in / 45.5 (48, 50.5) cm.
Abbreviations
- CO: Cast on — make the first row of loops on your needle.
- BO: Bind off — finish the edge so the stitches do not unravel.
- k: Knit stitch.
- p: Purl stitch.
- st(s): Stitch(es).
- RS: Right side — the side of the work that faces out.
- WS: Wrong side — the inside of the work.
- patt: Pattern — continue in the established stitch pattern.
- meas: Measures — the length from the cast-on edge.
- rem: Remaining stitches.
- inc: Increase — add one stitch (use a lifted increase or knit into the front and back of the same stitch).
- dec: Decrease — remove one stitch (knit two together at the neck edge).
Gauge
16 sts and 24 rows = 4 inches (10 cm) in fisherman rib, blocked. To check, knit a small swatch in the pattern, block it, and count the stitches and rows over 4 inches before you begin.
Tips Before You Start
- Fisherman rib pulls in, so always measure your blocked swatch rather than the unblocked fabric.
- Keep the 12-row stripe count consistent on every piece so the bands line up when you sew the jacket together.
- Use a row counter or a small tally mark on paper to track the 12-row color changes.
- Because the panels are flat and boxy, check the finished length against the size you are making before binding off.
Step-by-Step Instructions
Fisherman Rib Pattern (all pieces)
Row 1 (RS): *k1, p1; rep from * to end.
Row 2 (WS): *p1, k1; rep from * to end.
Rows 3–24: Repeat Rows 1–2, ending with a WS row (24 rows total).
Repeat Rows 1–24 for the pattern throughout.
Back (A)
Row 1: With A, CO 96 (106, 116) sts.
Rows 1–12: Work in fisherman rib in A (96 (106, 116) sts).
Rows 13–24: Change to B and work in fisherman rib (96 (106, 116) sts).
Rows 25 onward: Continue in 12-row stripes of A and B until the piece measures 24 (25, 26) in from the cast-on edge, ending with a WS row.
Final row: BO all sts.
Front Left (A)
Row 1: With A, CO 48 (53, 58) sts.
Rows 1–12: Work in fisherman rib in A (48 (53, 58) sts).
Rows 13–24: Change to B and work in fisherman rib (48 (53, 58) sts).
Rows 25 onward: Continue in 12-row stripes as for the Back until the piece measures 18 (19, 20) in from the cast-on edge, ending with a WS row.
Neck shaping, next row (RS): BO 6 (7, 8) sts, work in patt to end (42 (46, 50) sts).
Next 4 RS rows: Dec 1 st at the neck edge (38 (42, 46) sts).
Work even: Continue in patt until the piece measures 24 (25, 26) in from the cast-on edge, ending with a WS row.
Final row: BO rem 38 (42, 46) sts.
Front Right (A)
Row 1: With A, CO 48 (53, 58) sts.
Rows 1–12: Work in fisherman rib in A (48 (53, 58) sts).
Rows 13–24: Change to B and work in fisherman rib (48 (53, 58) sts).
Rows 25 onward: Continue in 12-row stripes as for the Back until the piece measures 18 (19, 20) in from the cast-on edge, ending with a WS row.
Neck shaping, next row (RS): Work in patt to the last 6 (7, 8) sts, BO 6 (7, 8) sts (42 (46, 50) sts).
Next 4 RS rows: Dec 1 st at the neck edge (38 (42, 46) sts).
Work even: Continue in patt until the piece measures 24 (25, 26) in from the cast-on edge, ending with a WS row.
Final row: BO rem 38 (42, 46) sts.
Sleeves (make 2, A)
Row 1: With A, CO 40 (44, 48) sts.
Rows 1–12: Work in fisherman rib in A (40 (44, 48) sts).
Rows 13–24: Change to B and work in fisherman rib (40 (44, 48) sts).
Rows 25 onward: Continue in 12-row stripes as for the Back, and inc 1 st at each end every 8th row 10 times (50 (54, 58) sts).
Work even: Continue in patt until the piece measures 18 (19, 20) in from the cast-on edge, ending with a WS row.
Final row: BO all sts.
Collar (A)
Set-up: With RS facing and A, pick up and knit 80 (84, 88) sts evenly around the neck edge.
Rows 1–12: Work in fisherman rib in A (80 (84, 88) sts).
Continue: Work in fisherman rib until the collar measures 2 in.
Final row: BO all sts.
Assembly and Finishing
Sew the shoulder seams with the right sides together. Set in the sleeves, matching the center of each sleeve to the shoulder seam. Sew the side seams and the sleeve seams. Weave in all ends on the wrong side. Block the jacket to the finished measurements, pinning the edges flat and allowing it to dry completely before wearing.
Pro Tips and Variations
- Try a solid version in a single color for a quieter look, or swap the stripe widths to 6 rows for a finer folk stripe.
- Add a simple crochet chain or a contrast-color bind-off at the collar for a small pop of color.
- For a longer jacket, add extra 12-row stripes to the Back and Fronts before the neck shaping, keeping the sleeve length the same.