Leather-Bound Crochet Bath Mitt Free Pattern
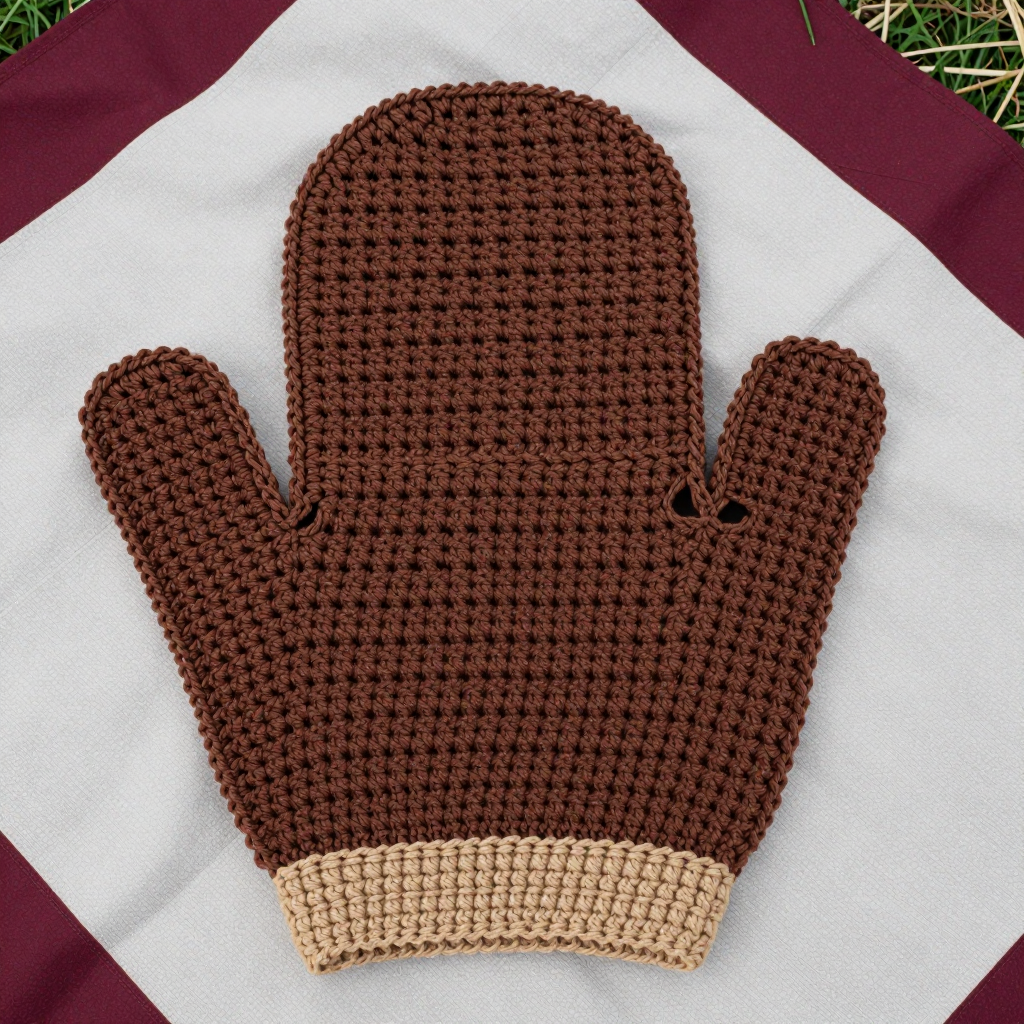
Leather-Bound Crochet Bath Mitt Free Pattern
Introduction
This leather-bound bath mitt is a perfect first project for anyone who has just learned single crochet and wants to make something they will actually use every day. Worked in rich brown cotton with a contrasting tan band at the cuff, it has the look of a vintage leather wash mitt but the soft, scrubby feel of handmade cotton. The mitt is simply two flat rectangles joined together with a small thumb opening, so there is no shaping, no working in the round, and no complicated counting. It makes a lovely spa gift, a cozy addition to your own bathroom, and a satisfying weekend make.
Materials Needed
- Yarn: Worsted weight (4) cotton yarn. Approximately 120 yards of brown (Color A) and 30 yards of tan (Color B). Cotton is recommended because it holds up to water and dries well.
- Hook: 5 mm (H/8) crochet hook, or the size needed to match gauge.
- Notions: Tapestry needle for weaving in ends, scissors, and a stitch marker (optional, for marking the thumb opening).
- Finished size: Approximately 7 inches wide x 9 inches long, fitting an average adult hand.
Abbreviations
- ch — chain: yarn over and pull through the loop on your hook.
- sc — single crochet: insert hook into stitch, yarn over, pull up a loop, yarn over, pull through both loops.
- st(s) — stitch(es).
- WS — wrong side: the back face of the fabric.
- RS — right side: the front face of the fabric.
Gauge
16 stitches and 16 rows = 4 inches in single crochet. To check, crochet a small swatch of single crochet and measure a 4-inch section in both directions; if you have more stitches than 16, go up a hook size, and if you have fewer, go down.
Tips Before You Start
- Keep your turning chains loose but consistent — a tight ch 1 at the start of each row makes the edges pull in and the panels will not lie flat.
- Count your stitches at the end of every row. Each panel should always have 28 stitches until the thumb opening, which makes mistakes easy to spot early.
- Work the two panels to the same length before joining; lay them side by side and check they match, since cotton can relax slightly as you work.
- When you reach the thumb opening, place a stitch marker in the skipped 8 stitches so you can clearly see the gap you are creating.
Step-by-Step Instructions
Back Panel (Color A)
Row 1: Ch 29, sc in 2nd ch from hook and in each ch across (28 sts).
Rows 2–36: Ch 1, turn, sc in each st across (28 sts).
Fasten off.
Front Panel (Color A)
Row 1: Ch 29, sc in 2nd ch from hook and in each ch across (28 sts).
Rows 2–36: Ch 1, turn, sc in each st across (28 sts).
Do not fasten off.
Thumb Opening (Front Panel, continued)
Row 37: Ch 1, turn, sc in first 4 sts, ch 8, skip next 8 sts, sc in last 16 sts (20 sc and 8 ch).
Row 38: Ch 1, turn, sc in each st and each ch across (28 sts).
Rows 39–44: Ch 1, turn, sc in each st across (28 sts).
Fasten off. The front panel is now about 2 inches longer than the back panel, and the chain-8 gap forms the thumb opening near the top of one side.
Cuff (Color B) — Front Panel
Join Color B to the bottom edge of the front panel.
Row 1: Ch 1, sc evenly across the bottom edge (28 sts).
Rows 2–6: Ch 1, turn, sc in each st across (28 sts).
Fasten off.
Cuff (Color B) — Back Panel
Join Color B to the bottom edge of the back panel.
Row 1: Ch 1, sc evenly across the bottom edge (28 sts).
Rows 2–6: Ch 1, turn, sc in each st across (28 sts).
Fasten off.
Assembly and Finishing
Place the front and back panels with wrong sides together, matching the side edges and the top edge. The front panel is longer than the back, so the extra length sits at the top where the thumb opening is. Join Color A along both side edges and across the top edge with single crochet, working through both layers, leaving the bottom edge (the cuff end) open. Fasten off. Weave in all ends neatly on the wrong side. Block lightly by misting with water and patting flat, then let the mitt dry completely before use.
Pro Tips and Variations
- Swap the tan cuff for a deep charcoal or cream band for a different leather-binding look, or use a self-striping cotton for a subtle marled effect.
- Add a hanging loop by chaining 10 and joining it to one corner of the cuff before fastening off.
- Make a matching set by working a second mitt in the same colors, or scale the panels up by a few stitches and rows for a larger hand.


