Lichen Toned Beret Free Crochet Pattern
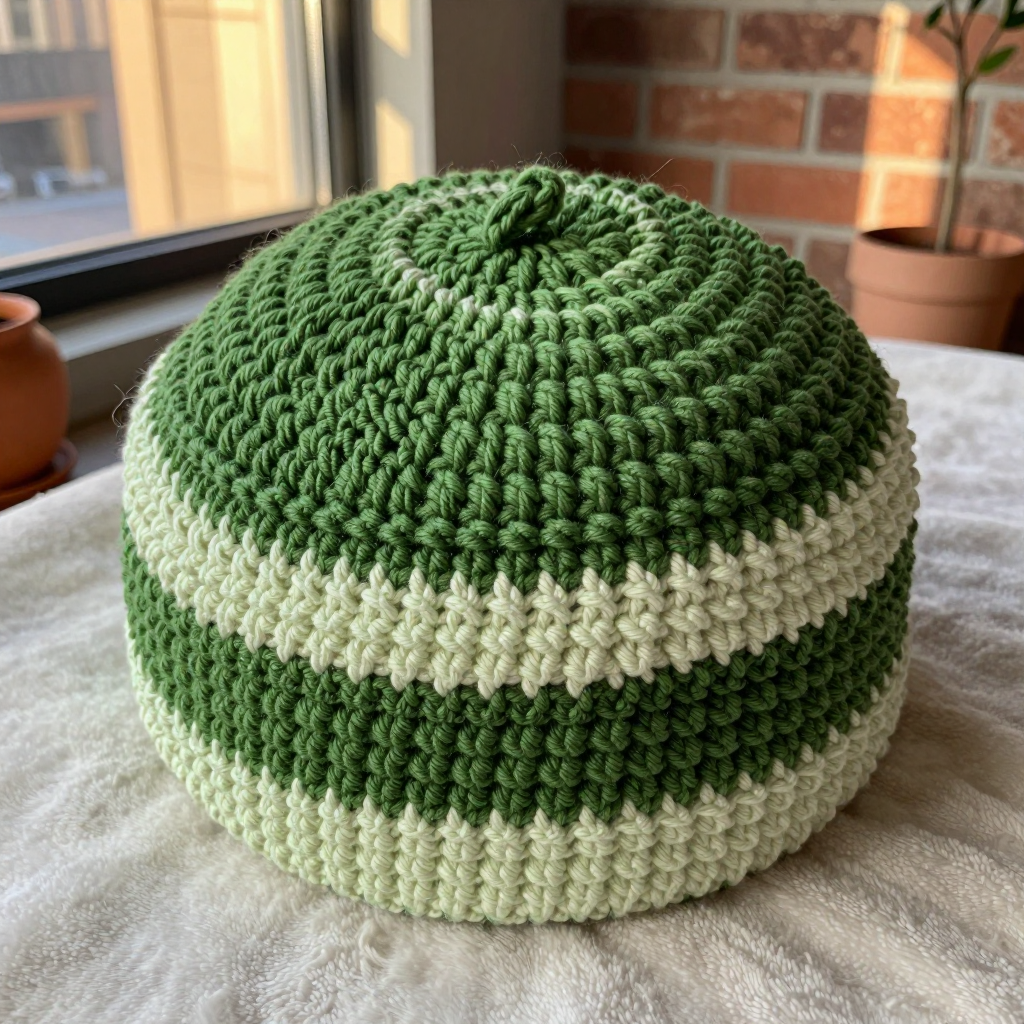
Lichen Toned Beret Free Crochet Pattern
Introduction
This minimalist two-tone beret is a lovely project for anyone who has mastered the basic double crochet and wants to make something that looks quietly elegant. Worked in soft moss green and pale lichen, it uses simple color blocks to create a calm, nature-inspired look that suits almost any outfit. The flat circular crown is gently pulled into a rounded beret shape, then finished with a tapered banded brim that hugs the head comfortably. It feels light and soft against the skin, and the DK wool blend gives it just enough warmth for cool days without any bulk.
Materials Needed
- Yarn: DK weight (3), wool or wool blend. 200 yds total: 100 yds moss green (A), 100 yds pale lichen (B).
- Hook: 4.0 mm (G-6) crochet hook.
- Notions: Stitch marker, tapestry needle, scissors, tape measure.
- Finished size: Circumference 20 inches (51 cm), height 8 inches (20 cm) including the brim.
Abbreviations
- MR: Magic ring — an adjustable loop used to start working in the round.
- dc: Double crochet — yarn over, insert hook, pull up a loop, yarn over and pull through two loops, yarn over and pull through the last two loops.
- inc: Increase — work 2 dc into the same stitch.
- dc2tog: Double crochet two together — a decrease worked across two stitches to make one.
- st(s): Stitch(es).
- Rnd: Round.
Gauge
16 sts and 8 rows in dc = 4 inches (10 cm). Work a small swatch in dc and measure it flat before beginning so your beret comes out the right size.
Tips Before You Start
- Use a stitch marker at the start of each round so you never lose your place in the long straight sections.
- Keep your tension even, especially on the decrease rounds, so the brim tapers smoothly without puckering.
- Change colors on the last stitch of the previous round for a neat, invisible join between color blocks.
- Count your stitches at the end of every increase and decrease round — the totals are your best guide.
Step-by-Step Instructions
Beret Crown (Color A)
Rnd 1: MR, 6 dc (6 sts).
Rnd 2: inc x6 (12 sts).
Rnd 3: [dc, inc] x6 (18 sts).
Rnd 4: [2 dc, inc] x6 (24 sts).
Rnd 5: [3 dc, inc] x6 (30 sts).
Rnd 6: [4 dc, inc] x6 (36 sts).
Rnd 7: [5 dc, inc] x6 (42 sts).
Rnd 8: [6 dc, inc] x6 (48 sts).
Rnd 9: [7 dc, inc] x6 (54 sts).
Rnd 10: [8 dc, inc] x6 (60 sts).
Rnd 11: [9 dc, inc] x6 (66 sts).
Rnd 12: [10 dc, inc] x6 (72 sts).
Rnd 13: [11 dc, inc] x6 (78 sts).
Rnd 14: [12 dc, inc] x6 (84 sts).
Rnd 15: [13 dc, inc] x6 (90 sts).
Rnd 16: [14 dc, inc] x6 (96 sts).
Rnd 17: dc in each st around (96 sts). Change to B.
Rnds 18-25: dc in each st around (96 sts). Change to A.
Rnd 26: dc in each st around (96 sts).
Rnd 27: [dc2tog, dc in next 14 sts] x6 (90 sts).
Rnd 28: dc in each st around (90 sts).
Rnd 29: [dc2tog, dc in next 13 sts] x6 (84 sts).
Rnd 30: dc in each st around (84 sts).
Rnd 31: [dc2tog, dc in next 12 sts] x6 (78 sts).
Rnd 32: dc in each st around (78 sts).
Rnd 33: [dc2tog, dc in next 11 sts] x6 (72 sts).
Rnd 34: dc in each st around (72 sts).
Brim (Color B)
Rnd 35: dc in each st around (72 sts).
Rnd 36: [dc2tog, dc in next 10 sts] x6 (66 sts).
Rnd 37: dc in each st around (66 sts).
Rnd 38: [dc2tog, dc in next 9 sts] x6 (60 sts).
Rnd 39: dc in each st around (60 sts).
Rnd 40: [dc2tog, dc in next 8 sts] x6 (54 sts).
Rnd 41: dc in each st around (54 sts).
Rnd 42: [dc2tog, dc in next 7 sts] x6 (48 sts).
Rnd 43: dc in each st around (48 sts).
Rnd 44: [dc2tog, dc in next 6 sts] x6 (42 sts).
Rnd 45: dc in each st around (42 sts).
Rnd 46: [dc2tog, dc in next 5 sts] x6 (36 sts).
Rnd 47: dc in each st around (36 sts).
Rnd 48: [dc2tog, dc in next 4 sts] x6 (30 sts).
Rnd 49: dc in each st around (30 sts).
Rnd 50: [dc2tog, dc in next 3 sts] x6 (24 sts).
Rnd 51: dc in each st around (24 sts).
Rnd 52: [dc2tog, dc in next 2 sts] x6 (18 sts).
Rnd 53: dc in each st around (18 sts).
Rnd 54: [dc2tog, dc in next st] x6 (12 sts).
Rnd 55: dc in each st around (12 sts).
Rnd 56: [dc2tog] x6 (6 sts). Fasten off.
Assembly and Finishing
Thread the yarn tail onto a tapestry needle and weave it through the remaining 6 stitches, then pull tight to close the top point of the brim. Weave in all ends neatly on the wrong side, especially at the color changes. Block the beret lightly by misting it with water and shaping it over a plate or a slightly larger round object to open up the crown and smooth the brim. Let it dry completely before wearing.
Pro Tips and Variations
- Swap the two colors for a bolder contrast, or work the whole beret in one color for a classic single-tone look.
- Add a round of single crochet in a contrasting shade along the brim edge for a crisp finished detail.
- Try a slightly larger hook for a looser, slouchier fit, or a smaller hook for a snugger beret.


