Pumpkin Season Diamond Bookmark: Free Crochet Pattern
Introduction
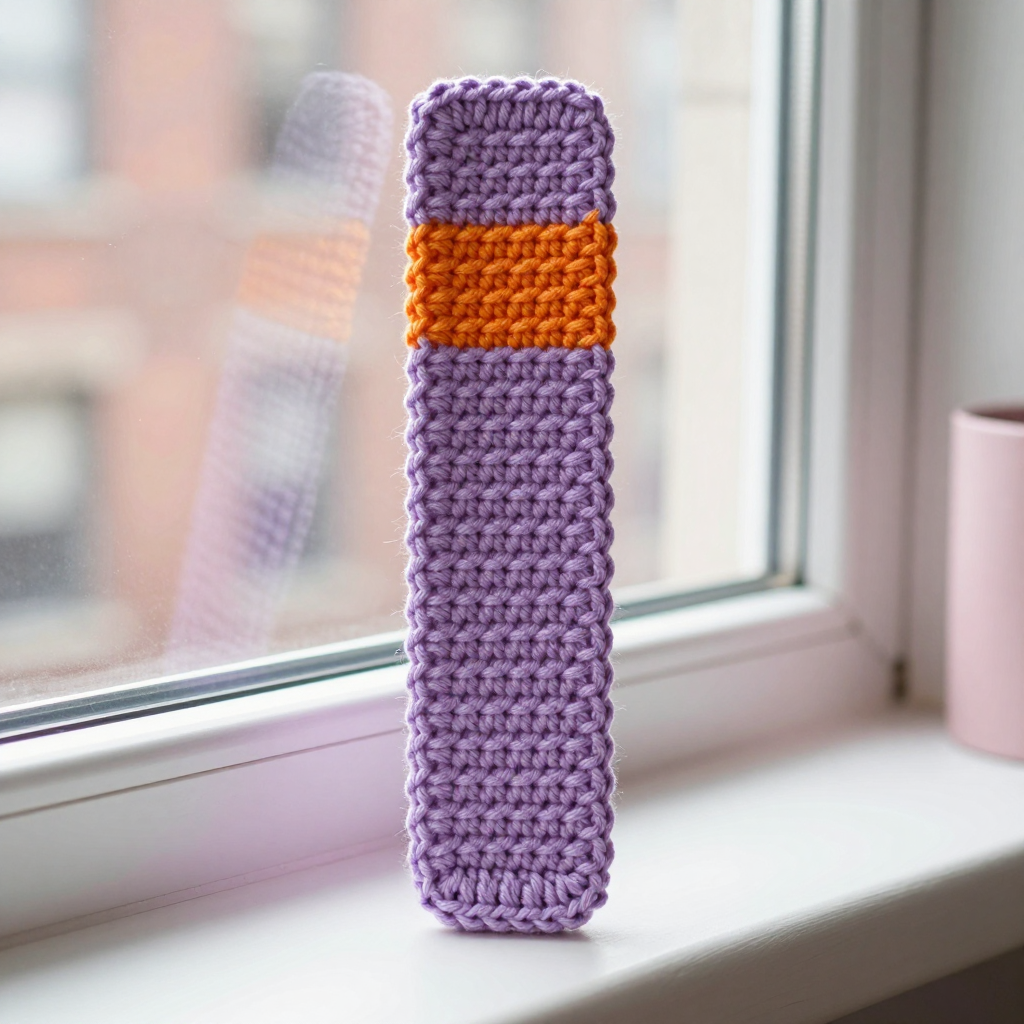
If you love a little handmade touch with your autumn reading, this Pumpkin Season Diamond Bookmark is just the thing. It is a beginner-friendly project worked in half double crochet through the back loop only, which gives it a soft, ribbed texture that feels cozy between the pages. The body is a calm lilac, with a warm pumpkin-orange band near the top that nods to the season without being fussy. It works up in under an hour, uses only a few yards of t-shirt yarn, and makes a lovely little gift for a fellow reader.
Materials Needed
- Yarn A: T-shirt yarn (approx. 5–7 mm thick), cotton or cotton-blend, lilac — approx. 20 yd (18 m)
- Yarn B: T-shirt yarn (approx. 5–7 mm thick), cotton or cotton-blend, pumpkin orange — approx. 2 yd (2 m)
- Hook: 6.0 mm (J-10) crochet hook
- Notions: Tapestry needle for weaving in ends, scissors, a ruler or measuring tape for checking gauge
- Finished size: Approx. 2 inches (5 cm) wide x 7 inches (18 cm) long
Abbreviations
- ch — chain: make a loop of yarn and pull it through the loop on your hook.
- hdc — half double crochet: yarn over, insert hook into stitch, yarn over, pull up a loop, yarn over, pull through all three loops on the hook.
- blo — back loop only: work into the loop of the stitch that is farthest from you, leaving the front loop unworked.
- st(s) — stitch(es)
- yd — yard(s)
Gauge
12 hdc x 10 rows = 4 inches (10 cm) in back-loop hdc. To check it, crochet a small swatch in blo hdc and measure a 4-inch section; if you have more stitches than 12, go up a hook size, and if you have fewer, go down a size.
Tips Before You Start
- T-shirt yarn is stretchy, so keep your tension relaxed and even; pulling tight will make the bookmark narrow and stiff.
- Always work into the back loop only (blo) as written — this is what creates the ribbed texture and keeps the strip flat.
- Change colors on the last pull-through of the final stitch of the row so the new color starts cleanly at the beginning of the next row.
- Leave tails of about 4 inches (10 cm) when fastening off so you have enough to weave in securely.
Step-by-Step Instructions
Bookmark Body
Work with Yarn A unless the row says otherwise.
Setup: With A, ch 7.
Row 1: Hdc in 2nd ch from hook and each ch across (6 hdc). Turn.
Rows 2–3: Ch 1, hdc in blo of each st across (6 hdc). Turn. Change to B.
Row 4: Ch 1, hdc in blo of each st across (6 hdc). Turn.
Row 5: Ch 1, hdc in blo of first 2 sts, hdc in blo of next 2 sts, hdc in blo of last 2 sts (6 hdc). Turn. Change to A.
Rows 6–31: Ch 1, hdc in blo of each st across (6 hdc). Turn.
Finishing the body: Fasten off.
Assembly and Finishing
There is no seaming for this project — it is worked as one continuous strip. Weave in all ends with the tapestry needle, running each tail back and forth through a few stitches so it stays secure. Block lightly: mist the bookmark with water, smooth it flat into a neat rectangle, and let it dry completely before using it. This helps the edges lie straight and the ribbed texture settle evenly.
Pro Tips and Variations
- Make a set: Work the same pattern in different color pairs (mustard and cream, sage and rust) for a stack of seasonal bookmarks.
- Add a tassel: Cut a few short strands of Yarn A, fold them through the bottom edge, and knot for a simple finishing touch.
- Adjust the length: Add or remove rows in the Rows 6–31 section to fit taller books or journals, keeping the same 6-stitch width.