Two-Tone Alpine Stitch Crochet Bandana Free Pattern for Large Dogs
Introduction
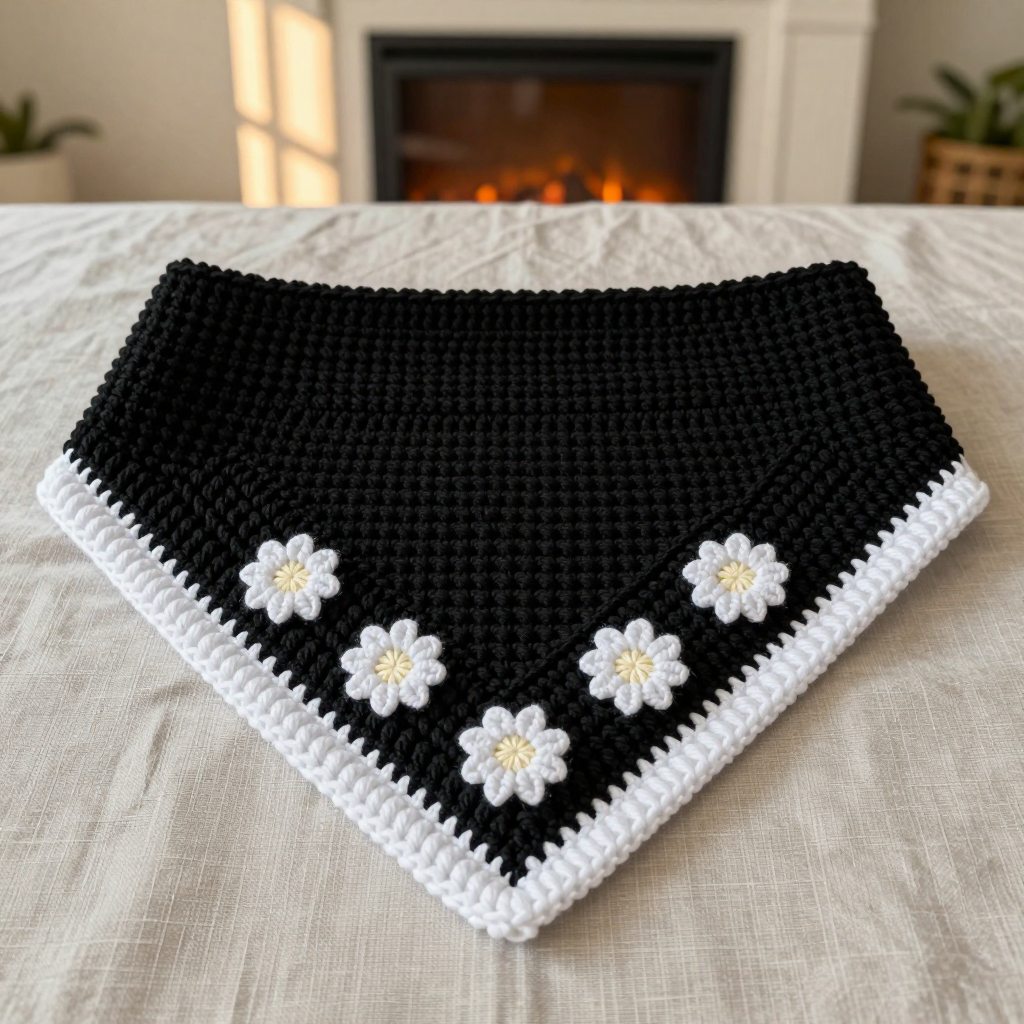
This two-tone alpine stitch bandana is made for the big dogs who deserve a little something extra on walk day. Worked in soft polyester chenille, it has a squishy, plush feel and a bold black body with a crisp white striped border and five tiny crocheted daisies along the bottom. The alpine stitch gives it a beautiful raised texture that looks far more complicated than it is, and the whole piece works up quickly on a big hook. It slips over the collar for easy wear, so there are no ties to fuss with, and it looks just as sweet on a weekend hike as it does on a trip to the vet.
Materials Needed
- Yarn: Super bulky (weight 6) polyester chenille. Color A (black): 150 yd. Color B (white): 50 yd.
- Hook: 8.0 mm (US L-11)
- Notions: Tapestry needle, scissors, stitch markers, measuring tape
- Finished size: Width at top 18 inches; depth 12 inches; neck opening 16 inches
Abbreviations
- ch — chain
- dc — double crochet
- fpdc — front post double crochet (work the dc around the post of the stitch below, from the front, instead of into the top of the stitch)
- sc — single crochet
- sl st — slip stitch
- MR — magic ring (an adjustable loop)
- st(s) — stitch(es)
Gauge
8 stitches x 6 rows = 4 inches in alpine stitch. Work a small swatch in the pattern and measure the middle of it; if you get more stitches than 8 in 4 inches, go up a hook size, and if you get fewer, go down.
Tips Before You Start
- Chenille yarn sheds and can be slippery, so keep your tension relaxed and avoid pulling tight on the fpdc stitches.
- Count your stitches at the end of every row. The bandana stays 35 stitches wide the whole way, so any drift is easy to spot.
- Mark the first stitch of each row with a stitch marker so you never lose your place in the post-stitch rows.
- When you change from black to white, leave a 6-inch tail of each color and weave them in later rather than knotting.
Step-by-Step Instructions
Bandana (Color A)
Row 1: With A, ch 37. Dc in the 4th ch from hook, then dc in each ch across (35 dc).
Row 2: Ch 2, turn. [Fpdc around next dc, dc in next dc] across, ending with dc (35 sts).
Row 3: Ch 2, turn. Dc in each st across (35 dc).
Rows 4-13: Repeat Rows 2-3 (35 sts).
Row 14: Change to B. Ch 2, turn. [Fpdc around next dc, dc in next dc] across, ending with dc (35 sts).
Row 15: Ch 2, turn. Dc in each st across (35 dc). Fasten off.
Edging (Color B)
Rnd 1: With B, join to the edge with a sl st. Sc evenly around the entire outer edge of the bandana, working 3 sc in each corner. Join with a sl st to the first sc. Fasten off.
Daisies (Color B) — make 5
Rnd 1: MR, 6 sc into the ring, join with a sl st to the first sc (6 sts).
Rnd 2: [Ch 2, sl st in the same st, ch 2, sl st in the next st] around to make 6 petals. Fasten off, leaving a 6-inch tail.
Assembly and Finishing
Thread each daisy tail onto the tapestry needle and sew the five daisies evenly spaced in a row along Row 13, the last black row, just above the white border. Weave in all ends on the wrong side, working each tail through a few stitches in both directions so the slippery chenille holds. Lay the bandana flat and mist lightly with water, then pat the edges straight and let it dry completely to even out the alpine texture.
Pro Tips and Variations
- Swap the daisies for small stars or hearts in color B for a different seasonal look.
- Make the white border wider by working Rows 14-17 in B for a bolder striped band.
- Use a contrasting color for the edging, such as red or mustard, to make the border pop against the black body.