Mid-Century Stripe Moss Snood: Free Knit Pattern
Mid-Century Stripe Moss Snood: Free Knit Pattern
Introduction
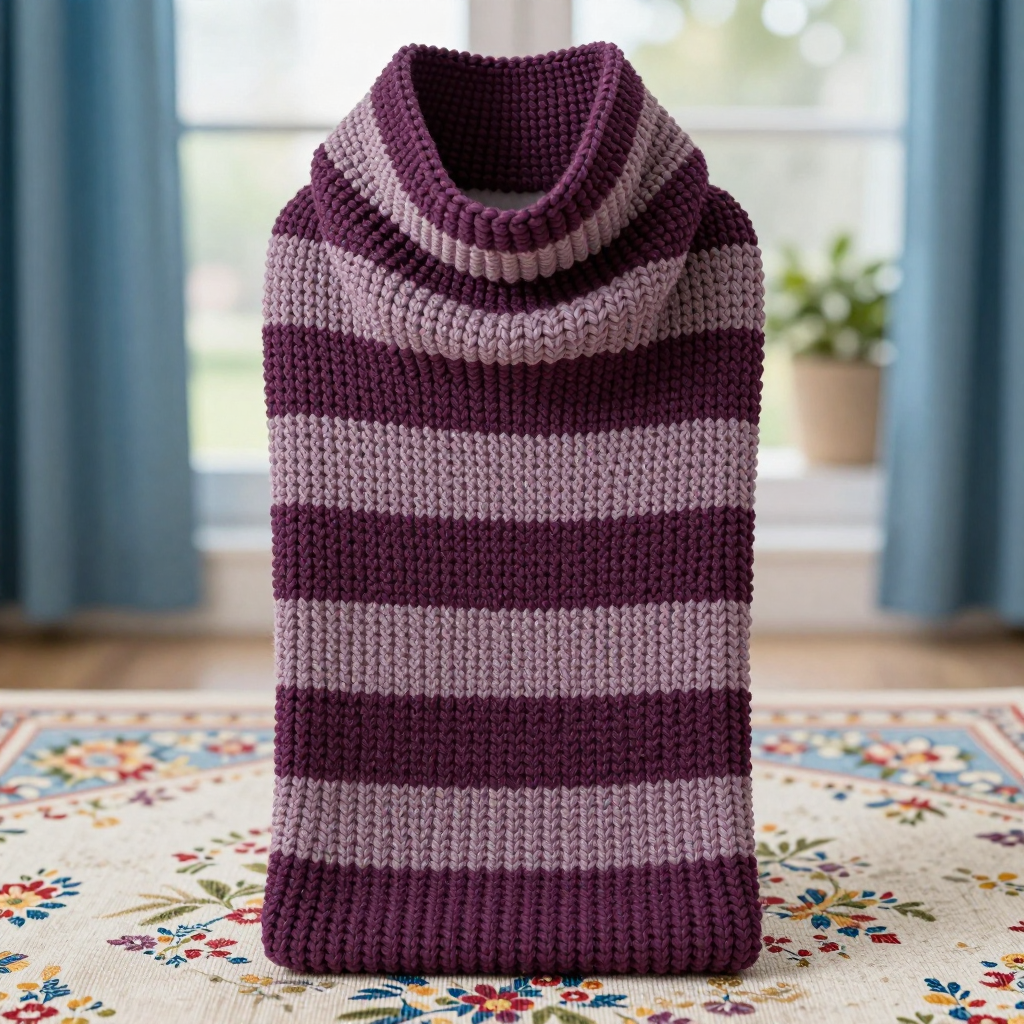
This snood is made for anyone who wants a bold, retro-looking accessory without tackling complicated shaping. It is simply one flat rectangle of moss stitch, striped in plum and mauve, then seamed into a tube. The bumpy, allover texture gives it a cozy, handcrafted feel, while the two narrow mauve stripes on the plum ground bring that graphic mid-century look. Slip it on over a coat or a plain sweater and it instantly adds color and warmth around the neck.
Materials Needed
- Yarn: Aran weight wool blend (for example 80% wool, 20% nylon), approx. 200 g total. Plum (MC): 150 g (approx. 240 m). Mauve (CC): 50 g (approx. 80 m).
- Needles: 5.0 mm (US 8) knitting needles.
- Notions: Tapestry needle for seaming and weaving in ends, scissors, a few stitch markers (optional), and a tape measure.
- Finished size: Circumference 60 cm, height 30 cm.
Abbreviations
- CO – cast on: make the starting stitches on your needle.
- st(s) – stitch(es).
- k – knit stitch.
- p – purl stitch.
- RS – right side: the side of the fabric that faces out.
- MC – main color (Plum).
- CC – contrast color (Mauve).
- BO – bind off: finish the stitches so they don't unravel.
Gauge
16 stitches and 24 rows = 10 cm in moss stitch. Knit a small swatch in moss stitch, lay it flat without stretching, and count your stitches and rows over 10 cm to check you match this gauge.
Tips Before You Start
- Moss stitch is just knit and purl alternating, offset every row — keep track of which stitch you are on, because the pattern flips each row.
- Change colors at the beginning of a row and leave a tail long enough to weave in later; the seam will hide the color changes.
- Count your stitches at the end of each color band to make sure you still have 96 stitches.
- Keep your tension relaxed and even so the moss stitch texture stays bumpy and soft rather than tight.
Step-by-Step Instructions
Rectangle (worked flat)
With MC, CO 96 sts.
Row 1 (RS): [k1, p1] to end (96 sts).
Row 2: [p1, k1] to end (96 sts).
Rows 3–12: Repeat Rows 1–2 five times (96 sts).
Change to CC.
Rows 13–16: Work 4 rows in moss stitch, repeating Rows 1–2 twice (96 sts).
Change to MC.
Rows 17–20: Work 4 rows in moss stitch, repeating Rows 1–2 twice (96 sts).
Change to CC.
Rows 21–24: Work 4 rows in moss stitch, repeating Rows 1–2 twice (96 sts).
Change to MC.
Rows 25–36: Work 12 rows in moss stitch, repeating Rows 1–2 six times (96 sts).
Final row: BO all sts in pattern (knit the knit stitches and purl the purl stitches as they appear).
Assembly
Fold the rectangle in half with right sides together, aligning the two short ends. Seam the short ends using mattress stitch to form a tube.
Assembly and Finishing
Turn the snood right side out so the seam sits inside. Weave in all ends neatly on the wrong side, especially at the color changes. Block lightly to measurements (60 cm circumference, 30 cm height) by pinning it flat and spritzing with water, then let it dry completely before wearing.
Pro Tips and Variations
- Swap the mauve for a mustard or teal to change the retro palette while keeping the same stripe layout.
- Make it taller by adding extra rows of MC at the top and bottom for a deeper, drapier snood.
- Try a single-color version in a tonal yarn for a quieter, textured look with the same moss-stitch feel.