Fox Crochet Hand Puppet Free Pattern
Introduction
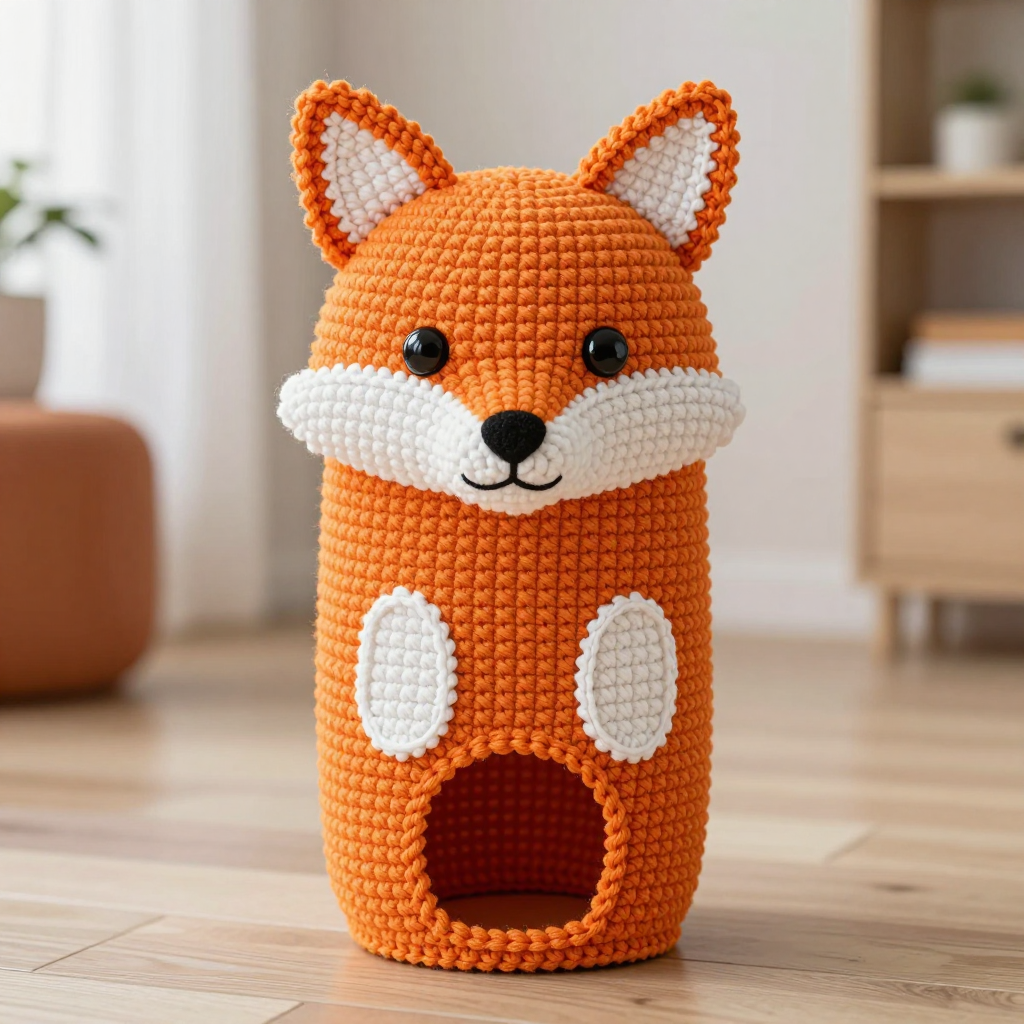
This fox hand puppet is the perfect first toy project for anyone who has just learned single crochet. It's worked in simple rounds of worsted-weight yarn on a 5 mm hook, so it grows quickly and stays easy on the hands. The finished puppet is about 4.5 inches wide and 9 inches tall, with a hollow open base that slips over a child's or adult's hand. Soft, squishy, and bright orange with crisp white cheeks and a pointed snout, it's made for giggles, bedtime stories, and puppet shows.
Materials Needed
- Yarn: Worsted weight (CYC 4) acrylic. Color A (orange): 120 yd. Color B (white): 40 yd. Color C (black): 5 yd.
- Hook: 5 mm (US H/8)
- Notions: Stitch marker, tapestry needle, scissors, small amount of polyester fiberfill (for the snout only)
- Finished size: Approx. 4.5 in (11.5 cm) wide x 9 in (23 cm) tall; fits a child or adult hand
Abbreviations
- ch – chain
- sc – single crochet
- inc – increase: work 2 sc in the same stitch
- dec – decrease: work 2 sc together into one stitch
- sl st – slip stitch
- MR – magic ring: a adjustable loop you crochet into to start a circle
- sts – stitches
- R / Rnd – row / round
Gauge
4 sc x 4.5 rows = 1 inch (2.5 cm). Work a small swatch in single crochet and measure a 1-inch section; if you have more stitches than 4, go up a hook size, and if you have fewer, go down.
Tips Before You Start
- Work the body in a continuous spiral unless the pattern says to join with a sl st; place a stitch marker in the first stitch of each round so you never lose your place.
- Keep your tension even but not tight — the body needs to stay soft and hollow so a hand slides in easily.
- Stuff only the snout, and stuff it lightly so it keeps its pointed shape without bulging.
- Pin every piece in place before sewing, and check the face from the front before you commit to the placement.
Step-by-Step Instructions
Body (Color A)
R1: Ch 19, sc in 2nd ch from hook, sc 16, 3 sc in last ch, turn work, sc 16 along opposite side of ch, 2 sc in last ch, sl st to first sc (38 sts).
R2: Ch 1, inc, sc 16, inc x3, sc 16, inc x2, sl st (44 sts).
R3: Ch 1, sc around (44 sts).
R4-14: Sc around (44 sts).
R15: Ch 1, sc 20, ch 4, skip 4, sc 20 (44 sts including ch).
R16-18: Sc around, working 1 sc in each ch of the ch-4 space (44 sts).
R19: Ch 1, [sc 9, dec] x4 (40 sts).
R20: Ch 1, [sc 8, dec] x4 (36 sts).
R21: Ch 1, [sc 7, dec] x4 (32 sts).
R22: Ch 1, [sc 6, dec] x4 (28 sts).
R23: Ch 1, [sc 5, dec] x4 (24 sts).
R24: Ch 1, [sc 4, dec] x4 (20 sts).
R25: Ch 1, [sc 3, dec] x4 (16 sts).
R26: Ch 1, [sc 2, dec] x4 (12 sts).
R27: Ch 1, dec x6 (6 sts). Fasten off, weave tail through the 6 sts, and pull closed.
Snout (Color B)
R1: MR, 6 sc (6 sts).
R2: Inc x6 (12 sts).
R3: [Sc, inc] x6 (18 sts).
R4-6: Sc around (18 sts).
R7: [Sc, dec] x6 (12 sts). Stuff lightly. Sew the snout to the front of the body over R20-26, centered.
Nose (Color C)
R1: MR, 4 sc, sl st to first sc. Fasten off and sew to the snout tip.
Cheek Patches x2 (Color B)
R1: Ch 6, sc in 2nd ch from hook, sc 3, 3 sc in last ch, turn, sc 3, 2 sc in last ch, sl st (12 sts).
R2: Ch 1, inc, sc 3, inc x3, sc 3, inc x2, sl st (18 sts). Fasten off. Sew one cheek patch to each side of the snout base, flat against the body.
Ears x2 (Color A)
R1: MR, 4 sc (4 sts).
R2: Inc x4 (8 sts).
R3: [Sc, inc] x4 (12 sts).
R4-8: Sc around (12 sts).
R9: [Sc, dec] x4 (8 sts).
R10: Dec x4 (4 sts). Fasten off, flatten, and sew each ear to the top of the head at R2-4, one on each side, with tips angled outward.
Inner Ears x2 (Color B)
R1: Ch 4, sc in 2nd ch from hook, sc 1, 3 sc in last ch, turn, sc 1, 2 sc in last ch, sl st (8 sts). Fasten off and sew centered on the front of each ear.
Eyes x2 (Color C)
R1: MR, 4 sc, sl st. Fasten off and sew above the snout, 1 in (2.5 cm) apart.
Edging (Color A)
Join A at the base opening, sc evenly around the opening (approx 44 sc), sl st to first sc. Fasten off.
Assembly and Finishing
Sew the snout, nose, cheeks, ears, inner ears, and eyes in the order listed, using the tapestry needle and a long tail of matching yarn. Use small, firm stitches and check placement from the front before knotting. Weave in all ends on the wrong side, then gently steam-block the puppet: mist lightly, shape the ears and snout with your fingers, and let it dry flat. Do not over-wet the fiberfill.
Pro Tips and Variations
- Swap the orange for gray or brown to make a wolf or a woodland fox in a different coat.
- Use safety eyes instead of crocheted circles for a sturdier toy, but keep them out of reach of children under 3.
- Add a small white tip to the tail of a matching amigurumi fox, or stitch a tiny white chin patch under the snout for extra character.