Orange Hexagon Stand Collar: Free Crochet Pattern
Orange Hexagon Stand Collar: Free Crochet Pattern
Introduction
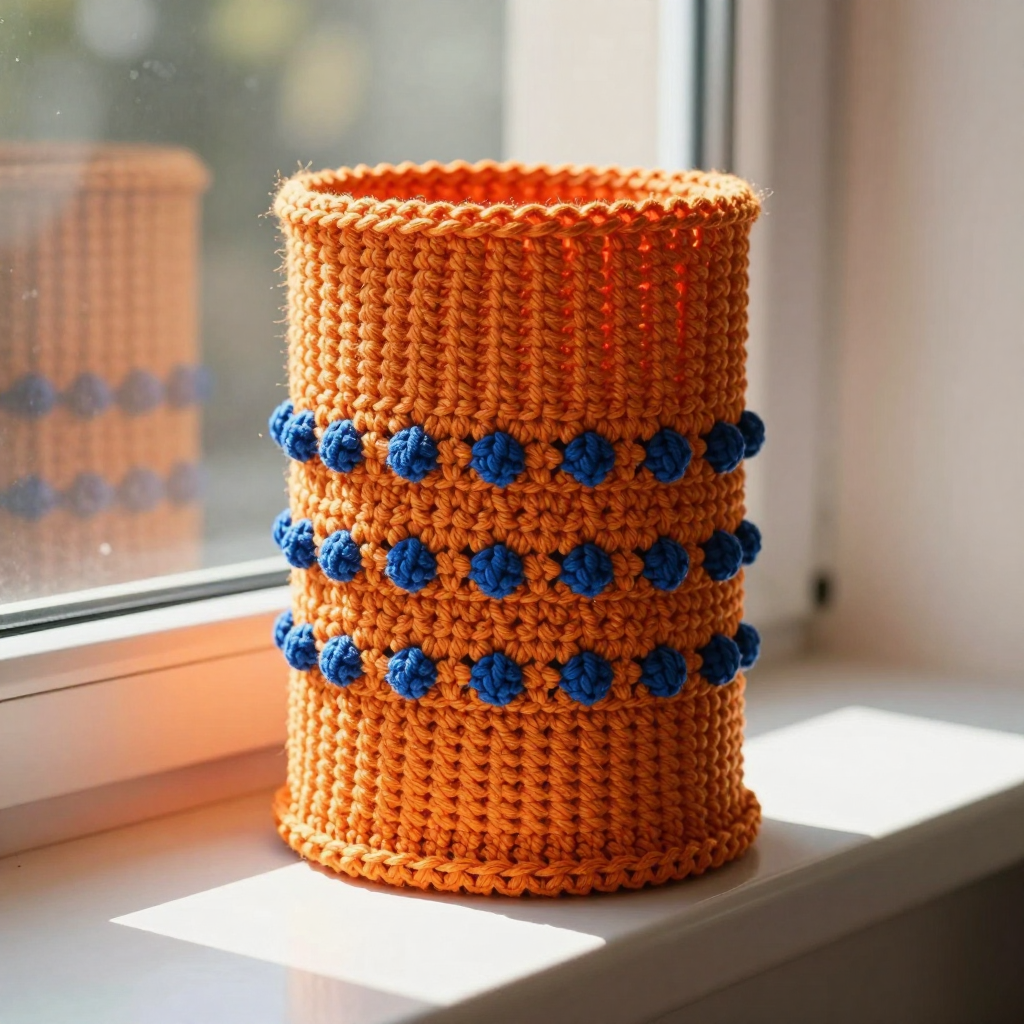
This little stand collar is the perfect project for anyone who has mastered the basics and wants to try something with a bit more texture. Worked as a seamless tube in Tunisian simple stitch, it stands upright around the neck like a small funnel, giving a cozy, coastal-grandmother feel to any outfit. The warm orange aran wool is dotted with raised cobalt honeycomb bumps that mimic a honeycomb grid, adding a playful pop of color and dimension. It is quick to make, uses only about 120 yards of yarn, and looks and feels like a dense, structured knit — a lovely accessory for teens and adults alike.
Materials Needed
- Yarn: Aran weight wool blend (e.g., 80% wool, 20% nylon), approximately 120 yards total: 100 yards orange (Color A), 20 yards cobalt (Color B).
- Hook: 6.0 mm (J-10) double-ended Tunisian crochet hook, or two 6.0 mm hooks joined with a flexible cable.
- Notions: Stitch marker, tapestry needle, scissors.
- Finished size: Circumference 14 inches (35.5 cm), height 3 inches (7.5 cm) — fits neck sizes 12–14 inches.
Abbreviations
- ch — chain
- sl st — slip stitch
- sc — single crochet
- yo — yarn over
- st(s) — stitch(es)
- Tss — Tunisian simple stitch
- FwP — forward pass
- RP — return pass
- rep — repeat
Gauge
14 stitches and 12 rows = 4 inches (10 cm) in Tunisian simple stitch. To check your gauge, work a small swatch in Tss and measure a 4-inch section; adjust your hook size if needed to match.
Tips Before You Start
- Because this collar is worked in the round with a double-ended hook, keep your loops relaxed and even — tight loops make the return pass difficult.
- Count your loops at the end of every forward pass to make sure you always have 50; a dropped loop will throw off the whole round.
- When working the raised bumps, insert your hook into the front horizontal bar exactly two rounds below — this creates the honeycomb texture.
- Use a stitch marker at the start of each round so you never lose your place in the seamless tube.
Step-by-Step Instructions
Collar Tube
Set-up: With A, ch 50, join with sl st to first ch to form a ring, being careful not to twist.
Set-up round: FwP: insert hook in first ch, yo, pull up a loop; rep in each ch around, leaving all loops on hook (50 loops). RP: yo, draw through first loop, *yo, draw through 2 loops; rep from * across until 1 loop remains on hook.
Rnds 1–6: Tss in each st around, working FwP and RP as set (50 sts).
Change to B.
Rnd 7 (bump round): *Tss in next 4 sts, work a raised bump: insert hook into front horizontal bar of st directly below next st (2 rounds down), yo, pull up a loop, yo, draw through 2 loops (sc made), then Tss in next st; rep from * around, ending with Tss in last 2 sts (approximately 8 bumps evenly spaced, 50 sts).
Change to A.
Rnds 8–10: Tss in each st around (50 sts).
Change to B.
Rnd 11 (bump round): Rep Rnd 7, offsetting bumps by 2 sts from the previous bump round (50 sts).
Change to A.
Rnds 12–14: Tss in each st around (50 sts).
Bind off: Using A, sl st in each st around. Fasten off.
Edging
Bottom edge: With A, join yarn at bottom edge, ch 1, sc in each st around (50 sc). Join with sl st to first sc. Fasten off.
Top edge: Rep bottom edge instructions for the top edge (50 sc). Fasten off.
Assembly and Finishing
There is no seaming required — the collar is worked seamlessly in the round. Weave in all ends securely on the wrong side, using the tapestry needle to hide them within the fabric. Block lightly to measurements: mist with water, shape into a 14-inch circumference by 3-inch tall tube, and let dry flat. This helps the collar hold its upright funnel shape.
Pro Tips and Variations
- Swap the cobalt bumps for a metallic or sparkly yarn to make the honeycomb texture pop even more.
- Work the collar in a solid color for a minimalist look, or use a self-striping yarn for a gradient effect.
- Add a third bump round between Rnds 12–14 for a denser honeycomb pattern, remembering to offset the bumps each time.