Pastel Dream Mesh Shrug: Free Knit Pattern
Pastel Dream Mesh Shrug: Free Knit Pattern
Introduction
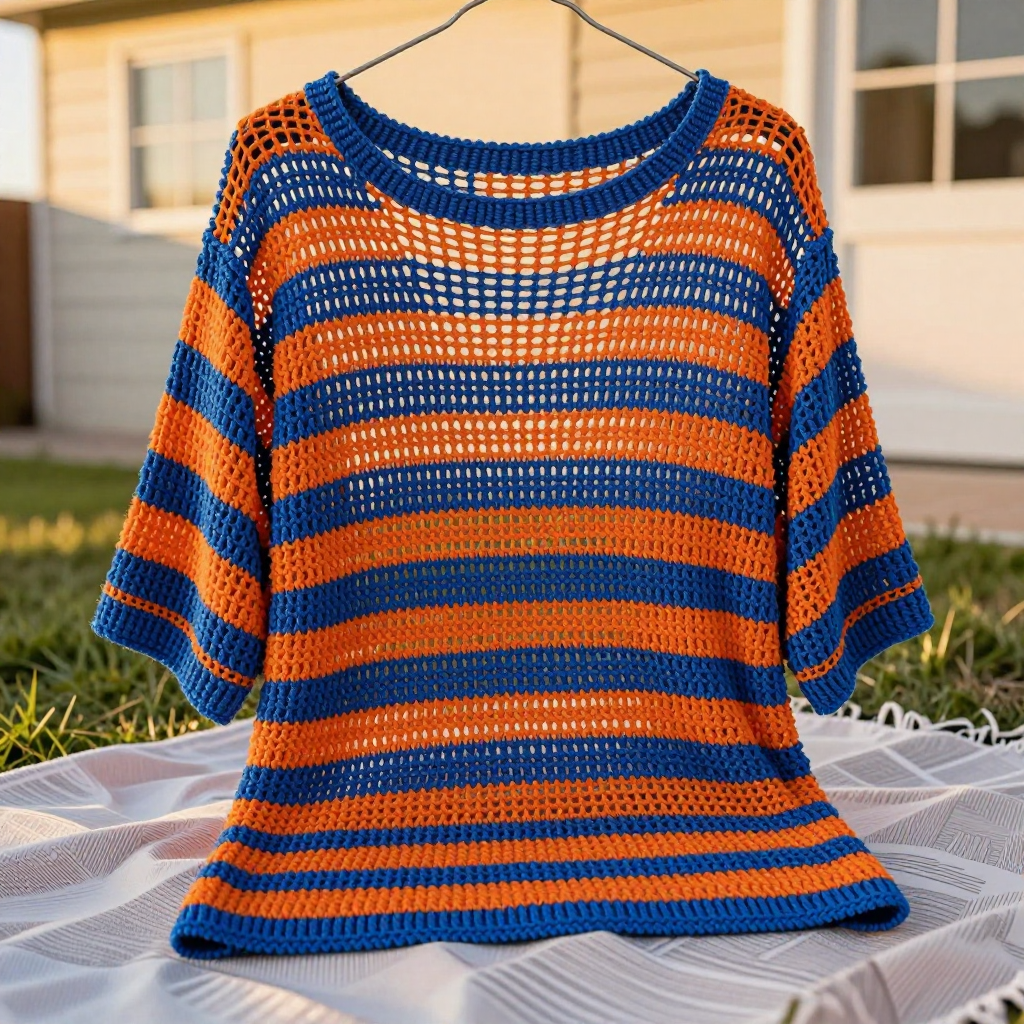
The Pastel Dream Mesh Shrug is the perfect first "real" garment for a new knitter — it's just one big rectangle, no shaping, no complicated counting. Worked in soft worsted cotton with a simple two-row eyelet mesh, it knits up quickly into a light, airy layer you can toss over a tank top or summer dress. The bold cobalt and orange stripes give it a playful, modern look, and the openwork texture makes it feel breezy rather than heavy. Fold it, seam two short edges, and you have a drapey, easy-to-wear shrug that works in almost any season.
Materials Needed
- Yarn: Worsted weight cotton (100% cotton; 100 g / 200 yds per skein):
- Color A (Cobalt): 2 skeins (approx. 400 yds)
- Color B (Orange): 2 skeins (approx. 400 yds)
- Needles: US 8 (5.0 mm) circular needle, 32" (80 cm) length (worked flat)
- Notions: Stitch markers (optional), tapestry needle for seaming and weaving in ends, tape measure, blocking mats and pins
- Finished size: Width 24" (61 cm), Length 40" (102 cm); fits bust 34–42" with 2–4" positive ease
Abbreviations
- CO — cast on: create the starting stitches on your needle.
- K — knit: insert needle through the front of the stitch and pull a loop through.
- P — purl: insert needle through the front of the stitch with yarn in front and pull a loop through.
- yo — yarn over: wrap the yarn over the needle to create an extra loop (this makes the eyelet hole).
- k2tog — knit two stitches together: knit the next two stitches as one, decreasing by one.
- RS — right side: the "public" side of the fabric.
- WS — wrong side: the back side of the fabric.
- BO — bind off: finish the edge so stitches don't unravel.
- rep — repeat: work the instructions again as many times as stated.
- sts — stitches.
Gauge
16 sts and 24 rows = 4" (10 cm) in the mesh lace pattern, blocked. Knit a small swatch in pattern, block it, and measure a 4" section in the middle — if you have more stitches than 16, go up a needle size; if fewer, go down.
Tips Before You Start
- Count on every right-side row. The mesh pattern always stays at 97 stitches — each yarn over is paired with a k2tog, so the count never changes. A quick count at the end of each RS row catches mistakes early.
- Keep the yarn overs loose. Tight yarn overs close up the eyelets; give the yarn a little slack as you wrap so the mesh stays open and airy.
- Change colors at the edge. Carry the unused color loosely up the side edge, or cut and rejoin — since the stripes are 10 rows deep, either works. Keep the carried strand relaxed so the edge doesn't pull in.
- Trust the rectangle. There is no shaping at all; the shrug's fit comes entirely from blocking and seaming, so don't skip the blocking step.
Step-by-Step Instructions
Mesh Lace Pattern (multiple of 2 sts + 1)
Row 1 (RS): K1, *yo, k2tog; rep from * to end (97 sts).
Row 2 (WS): Purl (97 sts).
Repeat Rows 1–2 for the pattern.
Body
Set-up: With Color A, CO 97 sts.
Rows 1–10: Work in Mesh Lace Pattern in Color A (97 sts).
Rows 11–20: Change to Color B. Work in Mesh Lace Pattern (97 sts).
Rows 21–30: Change to Color A. Work in Mesh Lace Pattern (97 sts).
Rows 31–40: Change to Color B. Work in Mesh Lace Pattern (97 sts).
Rows 41–50: Change to Color A. Work in Mesh Lace Pattern (97 sts).
Rows 51–60: Change to Color B. Work in Mesh Lace Pattern (97 sts).
Rows 61–70: Change to Color A. Work in Mesh Lace Pattern (97 sts).
Rows 71–80: Change to Color B. Work in Mesh Lace Pattern (97 sts).
Rows 81–90: Change to Color A. Work in Mesh Lace Pattern (97 sts).
Rows 91–100: Change to Color B. Work in Mesh Lace Pattern (97 sts).
Rows 101–110: Change to Color A. Work in Mesh Lace Pattern (97 sts).
Rows 111–120: Change to Color B. Work in Mesh Lace Pattern (97 sts).
Rows 121–130: Change to Color A. Work in Mesh Lace Pattern (97 sts).
Rows 131–140: Change to Color B. Work in Mesh Lace Pattern (97 sts).
Rows 141–150: Change to Color A. Work in Mesh Lace Pattern (97 sts).
Rows 151–160: Change to Color B. Work in Mesh Lace Pattern (97 sts).
Rows 161–170: Change to Color A. Work in Mesh Lace Pattern (97 sts).
Rows 171–180: Change to Color B. Work in Mesh Lace Pattern (97 sts).
Rows 181–190: Change to Color A. Work in Mesh Lace Pattern (97 sts).
Rows 191–200: Change to Color B. Work in Mesh Lace Pattern (97 sts).
Rows 201–210: Change to Color A. Work in Mesh Lace Pattern (97 sts).
Rows 211–220: Change to Color B. Work in Mesh Lace Pattern (97 sts).
Rows 221–230: Change to Color A. Work in Mesh Lace Pattern (97 sts).
Rows 231–240: Change to Color B. Work in Mesh Lace Pattern (97 sts).
Piece now measures approx. 40" from CO, ending with a WS row (240 rows total; 24 ten-row stripes).
Final row: BO loosely in pattern (97 sts bound off).
Assembly and Finishing
Block: Soak the rectangle in cool water, gently squeeze out excess, and pin it flat to 24" wide by 40" long. Let it dry completely — this opens the mesh and sets the final size.
Fold and seam: Fold the piece in half lengthwise with right sides together, so the long edges meet and the folded width is 24". Along each long edge, seam 8" from each end for the sleeves, leaving the center 24" of both long edges open for the back opening. Use a simple whipstitch or mattress stitch with the yarn tails or a matching length of yarn.
Weave in ends: Weave all yarn tails into the wrong side, following the stripe direction so they disappear into the mesh.
Final check: Turn right side out, give the seams a light press under a damp cloth, and try it on.
Pro Tips and Variations
- Change the stripe rhythm: Try 6-row or 14-row stripes, or work the whole shrug in one color for a minimalist look.
- Adjust the length: Add or remove 10-row stripe bands to make the shrug longer or shorter — just keep the sleeve seams at 8" and the back opening centered.
- Play with color: Swap cobalt and orange for soft pastels (lavender, mint, blush) to match the "pastel dream" name, or use a variegated cotton for a self-striping effect.