Rose and Grey Swatch Stash Trio Free Crochet Pattern
Introduction
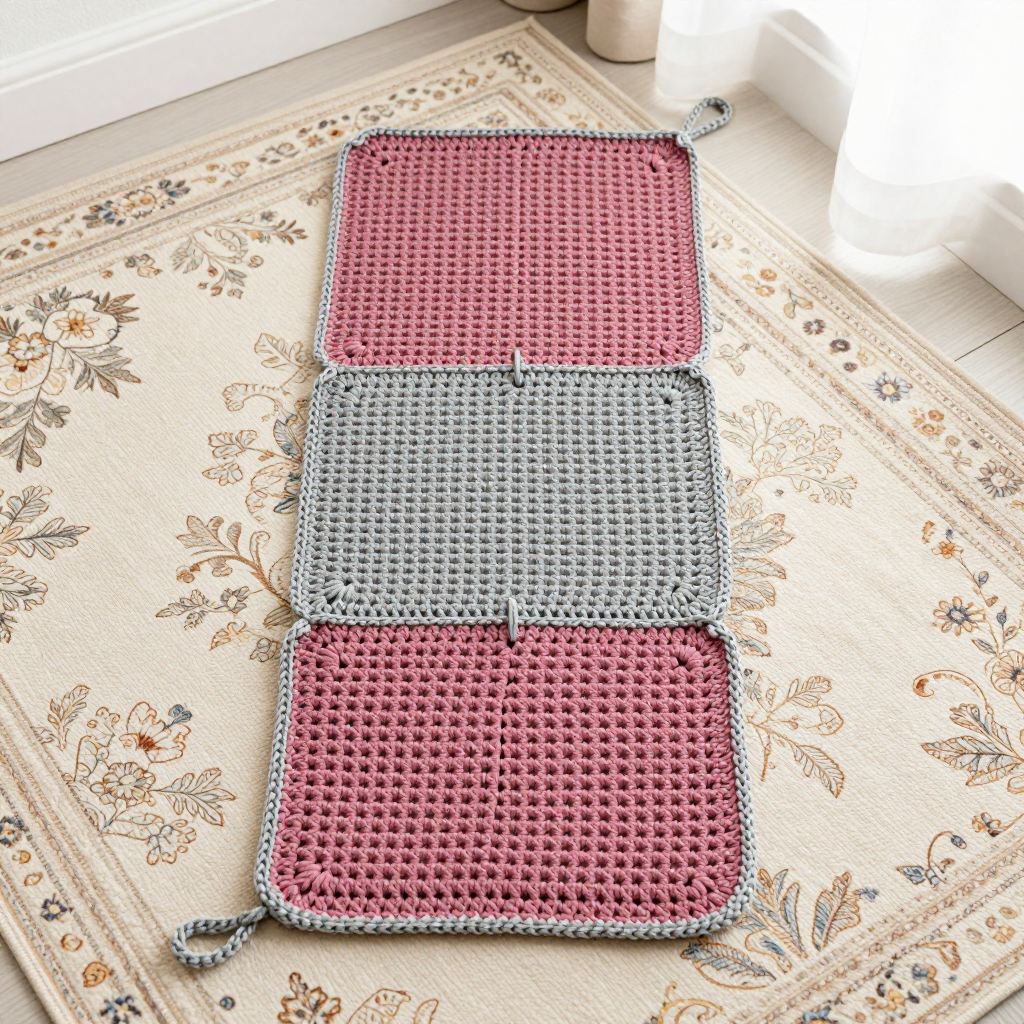
This Rose and Grey Swatch Stash Trio is the perfect little project for anyone who wants to slow down and really understand their basic stitches. If you're a beginner, you'll get hands-on practice with single, half double, and double crochet, all in one tidy strip. The dusty rose and grey palette gives it a calm, modern look that feels soft and smooth in the hand, with each square showing off its own distinct texture. Best of all, you finish with a handy reference strip you can keep in your project bag to compare stitches and check your gauge any time.
Materials Needed
- Yarn: Worsted weight (category 4) acrylic yarn, approximately 30 yards each of dusty rose (A) and grey (B).
- Hook: 5.0 mm (H-8) crochet hook.
- Notions: Tapestry needle for weaving in ends, scissors, and a measuring tape.
- Finished size: Each square measures 4 inches x 4 inches (10 cm x 10 cm). The joined strip measures 4 inches wide x 12.5 inches long (10 cm x 32 cm), excluding ties.
Abbreviations
- ch: chain — make a loop of yarn and pull it through the loop on your hook.
- sc: single crochet — insert hook, pull up a loop, yarn over, pull through both loops.
- hdc: half double crochet — yarn over, insert hook, pull up a loop, yarn over, pull through all three loops.
- dc: double crochet — yarn over, insert hook, pull up a loop, yarn over and pull through two loops, yarn over and pull through the last two loops.
- sl st: slip stitch — insert hook, yarn over, pull through both the stitch and the loop on your hook.
- st(s): stitch(es).
- Rnd/Row: round/row.
Gauge
The single crochet square should measure 4 inches x 4 inches (10 cm x 10 cm) = 16 sts x 18 rows. To check, work a small swatch in single crochet and measure the stitch and row counts against this gauge before starting your squares.
Tips Before You Start
- Keep your tension even across all three squares so they line up neatly when stacked.
- Count your stitches at the end of every row — each square stays 16 stitches wide throughout.
- Use a stitch marker in the first stitch of each row to avoid losing the edge stitch.
- Work the turning chains loosely so the side edges stay flat and easy to edge later.
Step-by-Step Instructions
Square 1: Single Crochet (Color A)
Ch 17.
Row 1: Sc in 2nd ch from hook and each ch across (16 sc).
Rows 2-18: Ch 1, turn, sc in each st across (16 sc).
Fasten off.
Square 2: Half Double Crochet (Color B)
Ch 18.
Row 1: Hdc in 3rd ch from hook and each ch across (16 hdc).
Rows 2-14: Ch 2, turn, hdc in each st across (16 hdc).
Fasten off.
Square 3: Double Crochet (Color A)
Ch 19.
Row 1: Dc in 4th ch from hook and each ch across (16 dc).
Rows 2-10: Ch 3, turn, dc in each st across (16 dc).
Fasten off.
Assembly Edging (Color B)
Arrange the squares vertically in order: Square 1 (top), Square 2 (middle), Square 3 (bottom), all with right side facing.
Right edge: With B, join yarn at top right corner of Square 1. Work sc evenly along the right edge of Square 1 (18 sc), then continue along the right edge of Square 2 (14 sc), then Square 3 (10 sc), working 1 sc in each row end and 1 sc in each corner. Fasten off.
Left edge: Repeat the same edging along the left edge of the joined strip, working 1 sc in each row end and 1 sc in each corner. Fasten off.
Ties (Color B)
Tie 1: Ch 30. Join with sl st to top right corner of joined strip. Fasten off.
Tie 2: Ch 30. Join with sl st to top left corner of joined strip. Fasten off.
Tie 3: Ch 30. Join with sl st to bottom center of joined strip. Fasten off.
Assembly and Finishing
If your squares aren't already joined edge-to-edge, seam them together along their horizontal edges with a simple whipstitch or mattress stitch using color B, keeping the right sides facing out. Weave in all ends securely on the wrong side with your tapestry needle. Block the finished strip lightly by misting it with water and pinning it flat to the measurements above; let it dry completely so the squares lie flat and even.
Pro Tips and Variations
- Swap the colors so each square alternates rose and grey for a bolder, checkerboard look.
- Add a fourth square in a different stitch, like moss stitch, to expand your reference strip.
- Use the strip as a bookmark or hang it from the ties as a small decorative swatch display.