Waffle Stitch Evil Eye Keyring Free Crochet Pattern
Introduction
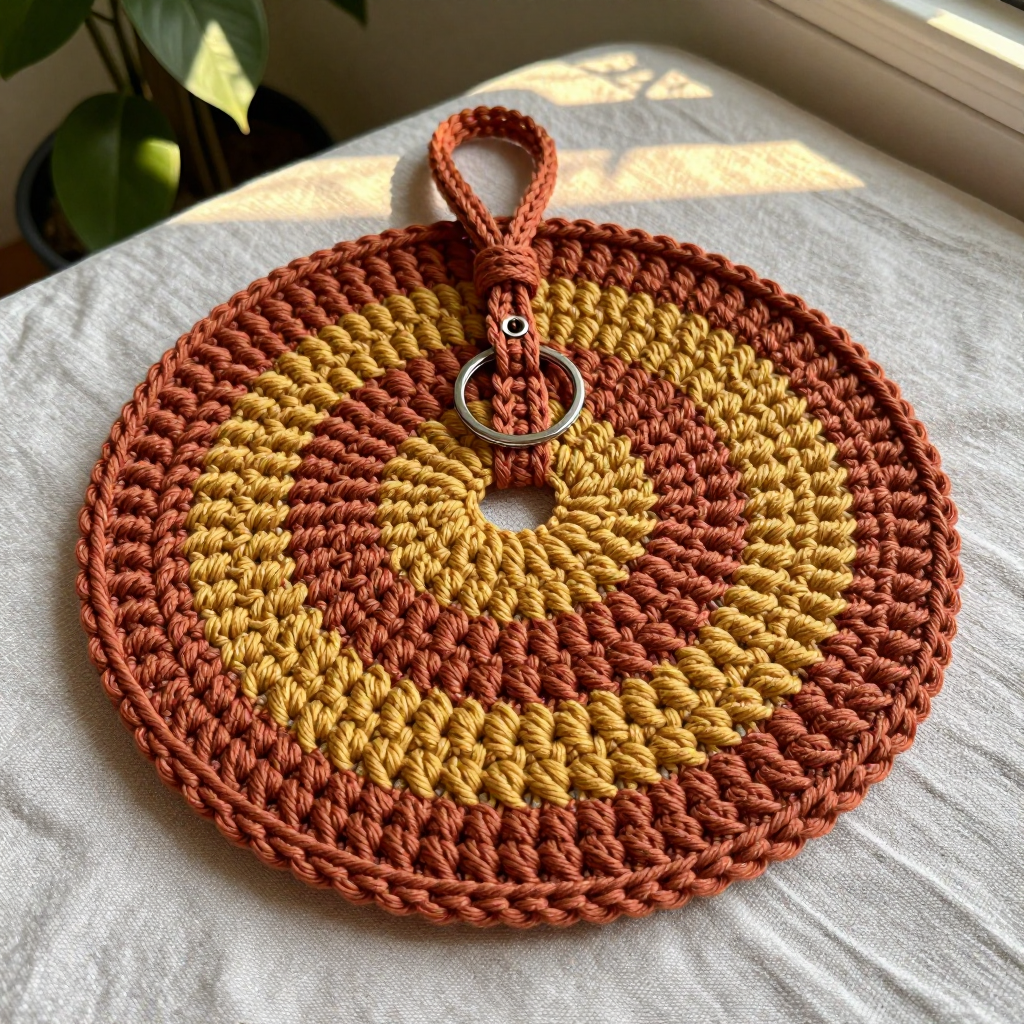
This little evil eye keyring is a quick, satisfying project that turns a few scraps of super bulky yarn into a chunky, folk-art charm in under half an hour. It's written for beginners who are ready to try their first post stitches, and every round is spelled out so you never have to guess. The waffle stitch gives the flat disc a bumpy, grid-like texture, with terracotta rings radiating out from the center and a mustard outer ring framing it all. At just 3 inches (7.5 cm) across, it's sturdy enough to live on your keys or a bag and soft enough to squeeze whenever you need a little luck.
Materials Needed
- Yarn: Super bulky (weight 6) yarn, 100% acrylic — terracotta (A) about 10 yds, mustard (B) about 5 yds
- Hook: 6.5 mm (K-10.5)
- Notions: Tapestry needle, scissors, stitch marker, a metal keyring (about 1" / 2.5 cm)
- Finished size: 3" (7.5 cm) diameter
Abbreviations
- ch — chain: make a loop of yarn and pull it through the loop on your hook
- sl st — slip stitch: insert hook, yarn over, pull through everything on the hook
- sc — single crochet: insert hook, yarn over, pull up a loop, yarn over, pull through both loops
- dc — double crochet: yarn over, insert hook, pull up a loop, yarn over and pull through two loops twice
- FPdc — front post double crochet: work a dc around the post (the vertical bar) of the indicated stitch, coming from the front
- st(s) — stitch(es)
- rnd — round
Gauge
8 sts x 8 rows = 4" (10 cm) in waffle stitch. Work a small swatch and measure the middle of it with your work lying flat — if you have more stitches than 8 in 4", go up a hook size; if fewer, go down.
Tips Before You Start
- Keep the FPdc loose. Post stitches worked tightly will pucker the disc; give each one a little slack so it sits raised on top of the fabric rather than pulling it in.
- Count every round. The stitch counts grow by 12 each round (12, 24, 36, 48) — if a round comes up short, a post stitch was probably skipped.
- Work the FPdc around the post, not into the top. Insert your hook side-to-side around the vertical bar of the stitch below, not through its top loops.
- Change color on the last pull-through. Finish the final dc of R3 by pulling mustard through the last two loops, so R4 starts cleanly in B.
Step-by-Step Instructions
Eye Motif
Worked in joined rounds with A, then B.
Setup: With A, ch 4, join with sl st to form a ring.
Rnd 1: Ch 3 (counts as first dc), 11 dc in ring, join with sl st to top of ch-3 (12 dc).
Rnd 2: Ch 3, FPdc around same st as ch-3, [dc in next st, FPdc around same st] 11 times, join with sl st to top of ch-3 (24 sts).
Rnd 3: Ch 3, dc in next st, FPdc around next st, [dc in next 2 sts, FPdc around next st] 11 times, join with sl st to top of ch-3 (36 sts). Change to B on the last pull-through.
Rnd 4: With B, ch 3, dc in next 2 sts, FPdc around next st, [dc in next 3 sts, FPdc around next st] 11 times, join with sl st to top of ch-3 (48 sts).
Fasten off and weave in ends.
Loop
With A, cut a 6" (15 cm) length of yarn. Fold it in half, insert your hook through the center of the eye motif, pull the folded loop through, then pull the two yarn ends through that loop to secure it. Knot the ends together to form a small hanging loop, and slide the keyring onto it.
Edging (optional)
With A, join yarn with a sl st to any st on Rnd 4, ch 1, sc in each st around, join with sl st to first sc. Fasten off and weave in ends.
Assembly and Finishing
There's no seaming — the motif is worked in one piece. Weave in all ends on the wrong side, running each tail through a few stitches before trimming. Gently flatten the disc and block it by misting lightly and pressing it flat under a cloth, or pin it to shape and let it dry; this settles the raised waffle texture and keeps the circle even. Check that the loop knot is secure and the keyring moves freely before you call it done.
Pro Tips and Variations
- Swap the colors: Try navy and cream, or sage and blush, for a different folk-art look — just keep the contrast between the center rings and the outer ring.
- Make a tiny version: Stop after Rnd 3 for a 2¼" (5.5 cm) charm, or add a fifth round of 4 dc between FPdc for a larger 3¾" (9.5 cm) disc.
- Skip the keyring: Thread a lobster clasp or a safety pin through the loop to use it as a zipper pull or bag charm instead.